This is a static archive scraped from the now-closed superduke.net forum. If this archive has helped you at all and you fancy buying me a pint to say thanks, you can do so at buymeacoffee.com.

My "real" tail tidy, so far.

TheJoker

TheJoker

2008-11-25 11:17:00 UTC

Hey guys,

Some of you might remember that I did a sort of makeshift tail tidy. See the thread "" for a reminder if you want. As was stated by SDR in the thread, and as I feared it wasn't strong enough. Killed by the vibrations.
In fact, everything got distorted on the old one.

Like this:
Image

And, despite some reinforcements it cracked too:
Image

So, therefore I am more or less forced to build a new one.
Been tinkering in it for a few days now.

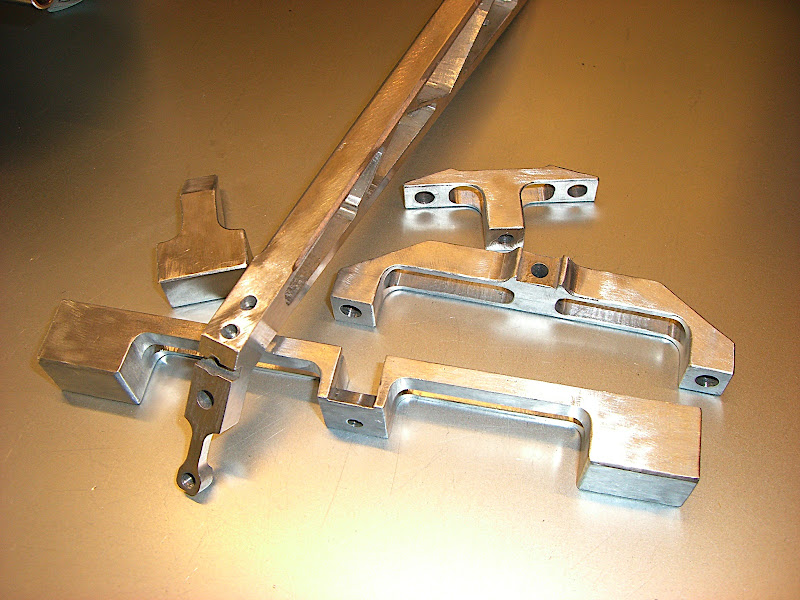
It looks like it's going to be made up of 4+1 parts. I say plus one because the licenseplate light is a bit of an odd-one.
There's two holders onto the bike. The front and rear, then there's the arm out to the plate, and then there's the indicator holder. And, the +1, a modified Motrax LED indicator license plate light.

My first goal is to fit all the bits into place. I'll then proceed to machining the bits down so that they look nicer. My mind doesn't work really well in abstract 3D and I'm too organic to sit down in a solid modelling software to model the whole shabang out before I start working on the material.

So here goes.

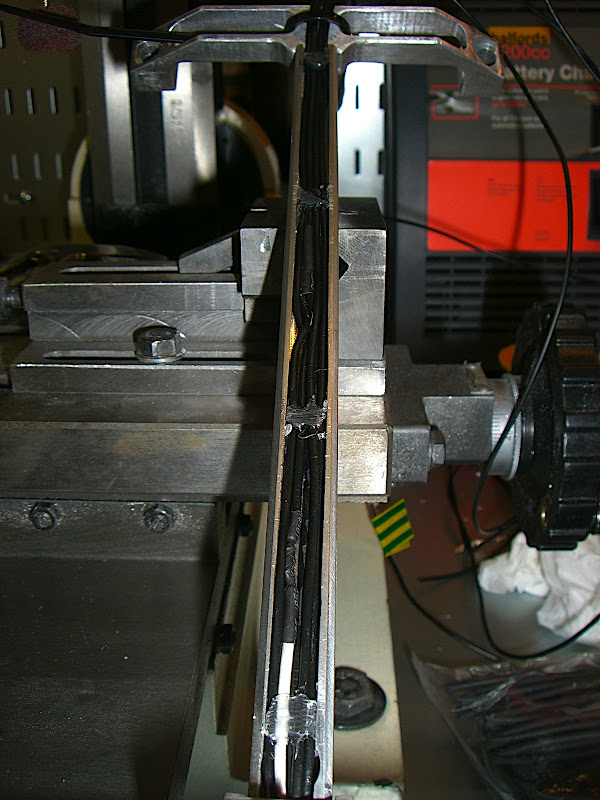
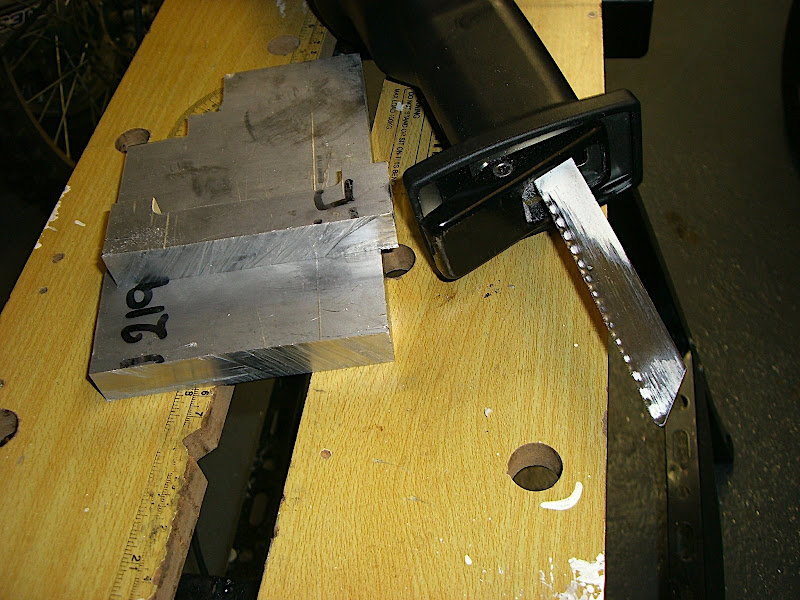
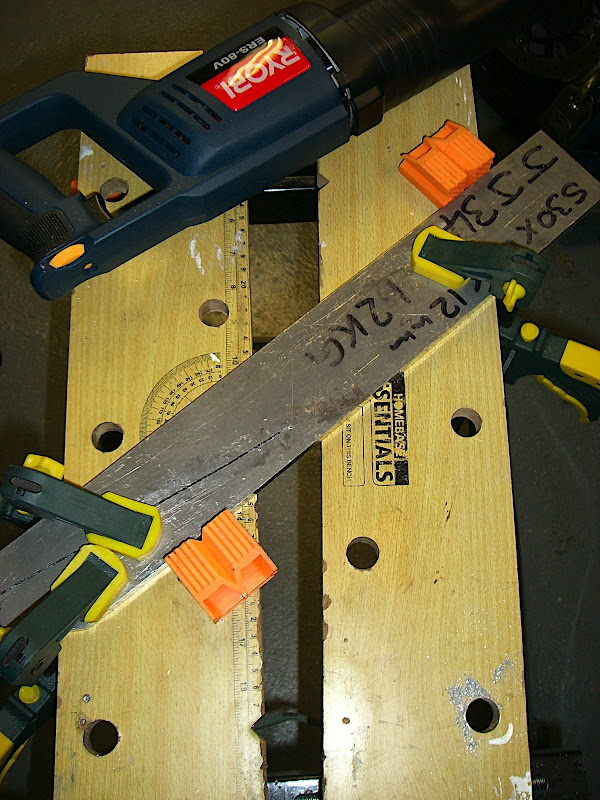
Cutting the front piece of aluminium with a reciprocating saw.
Image

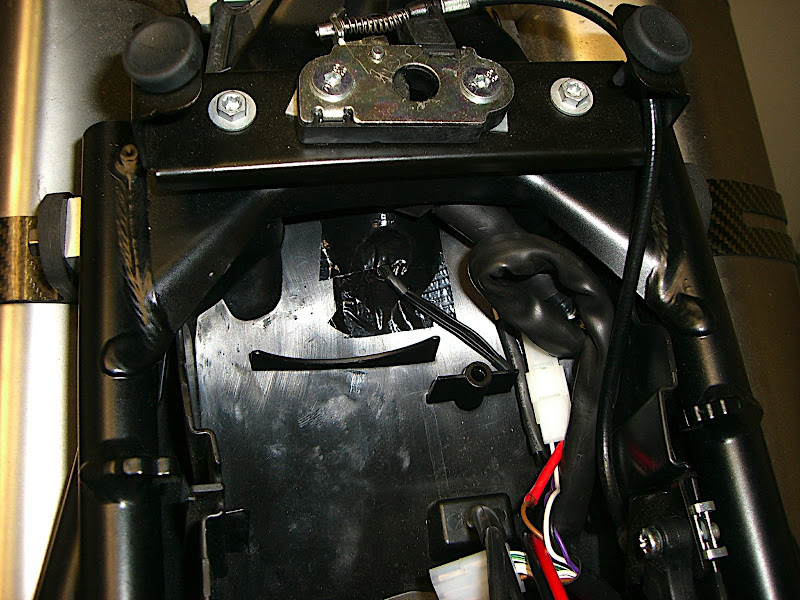
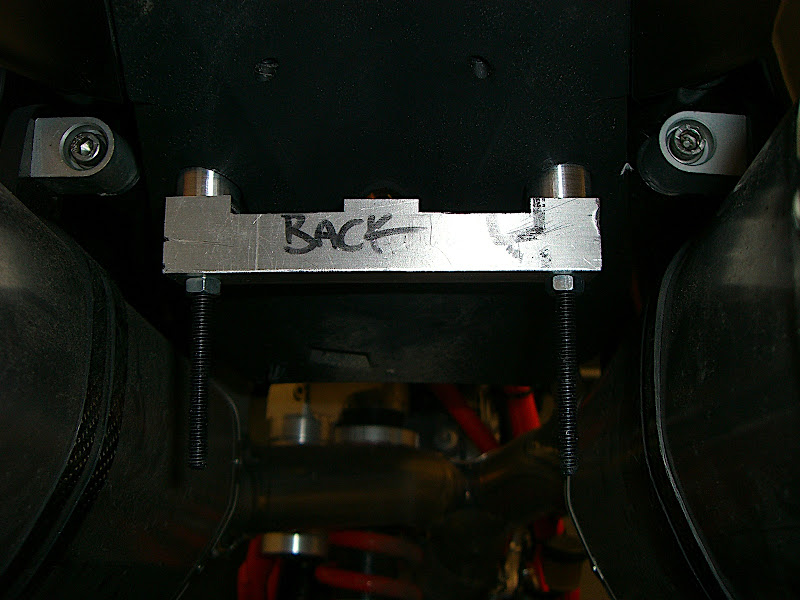
Front holder in situ on the bike. Note it's not finished off yet, just "functional"
Image

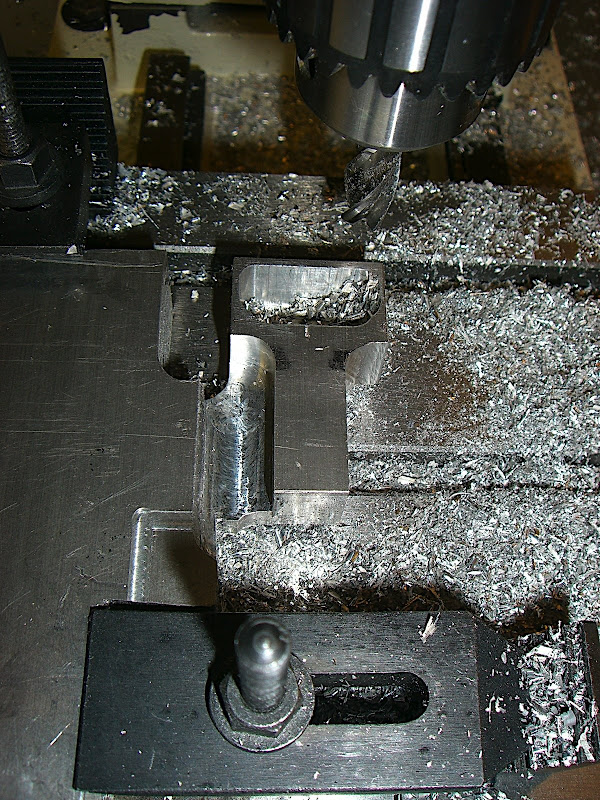
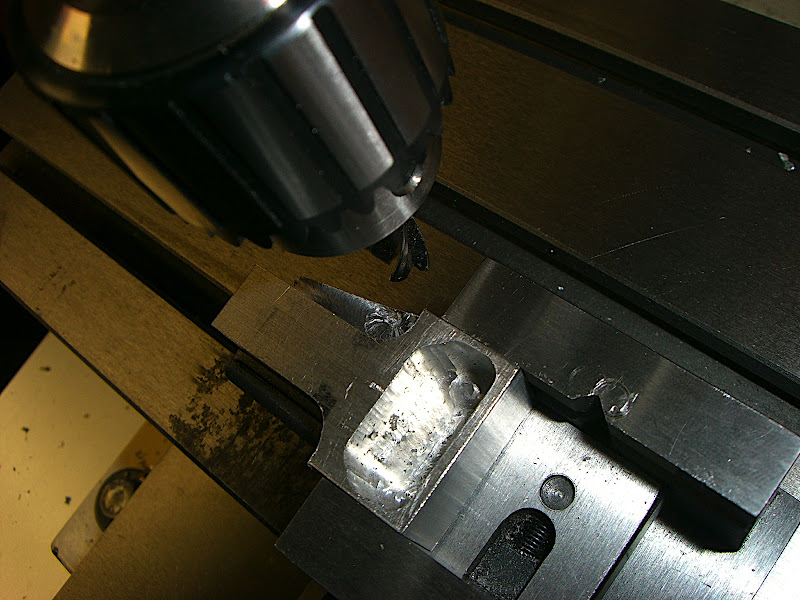
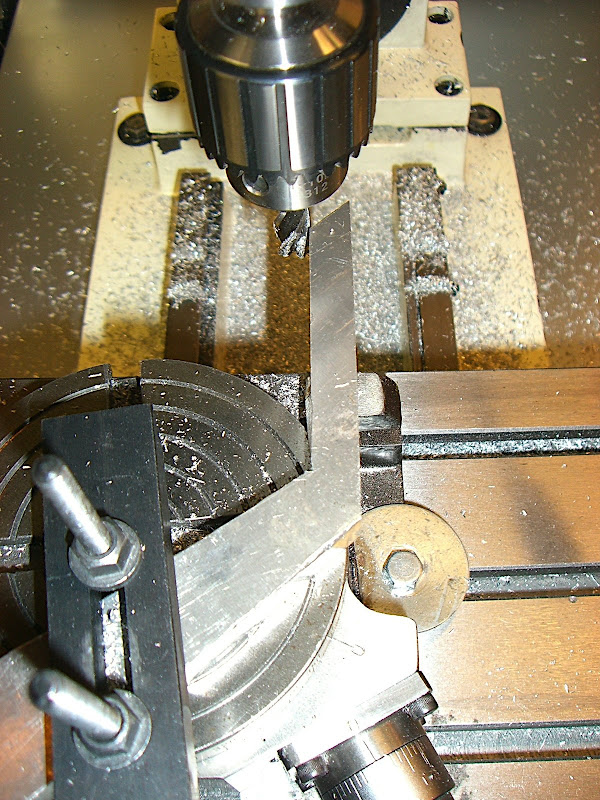
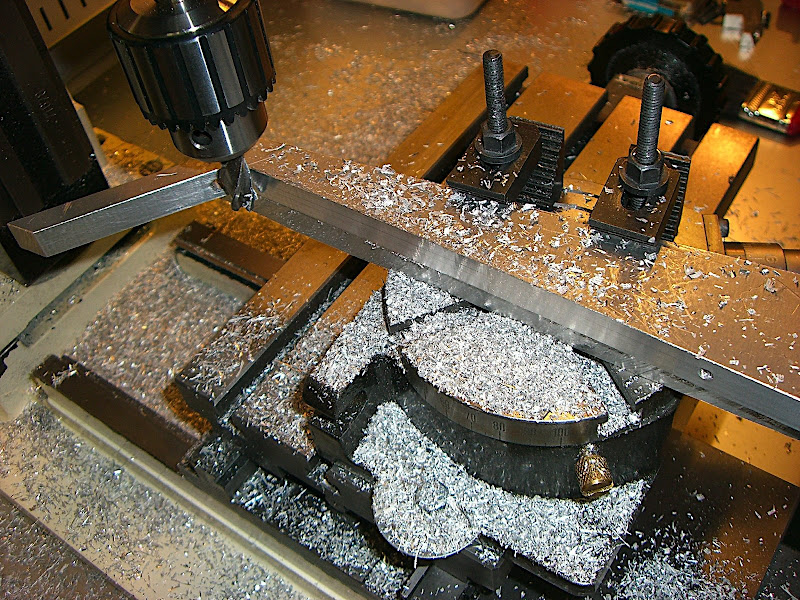
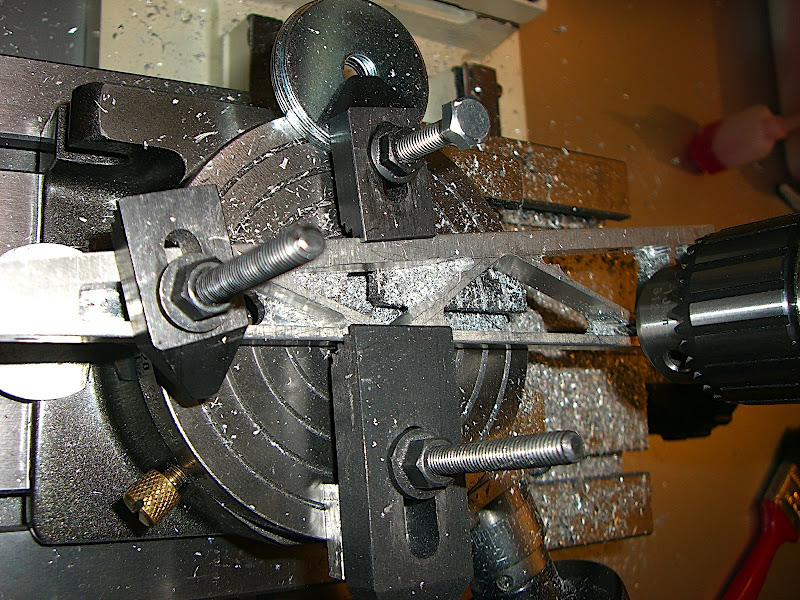
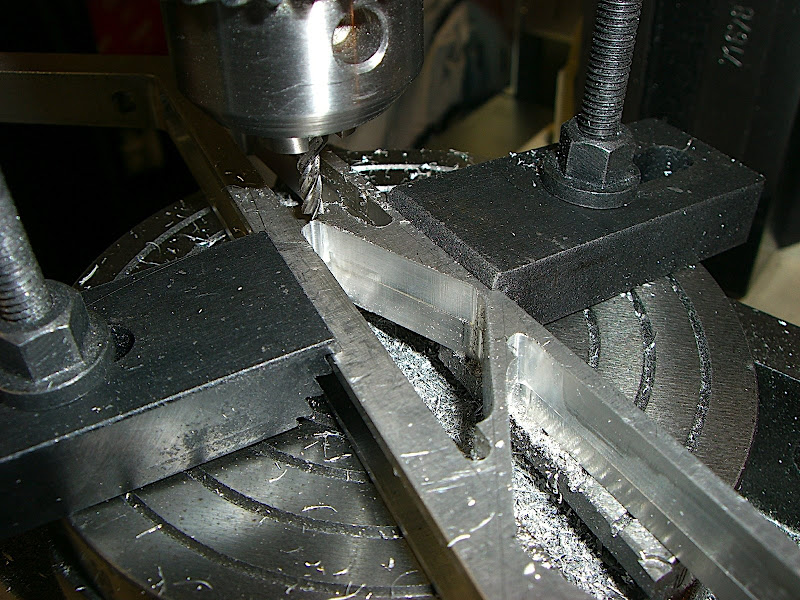
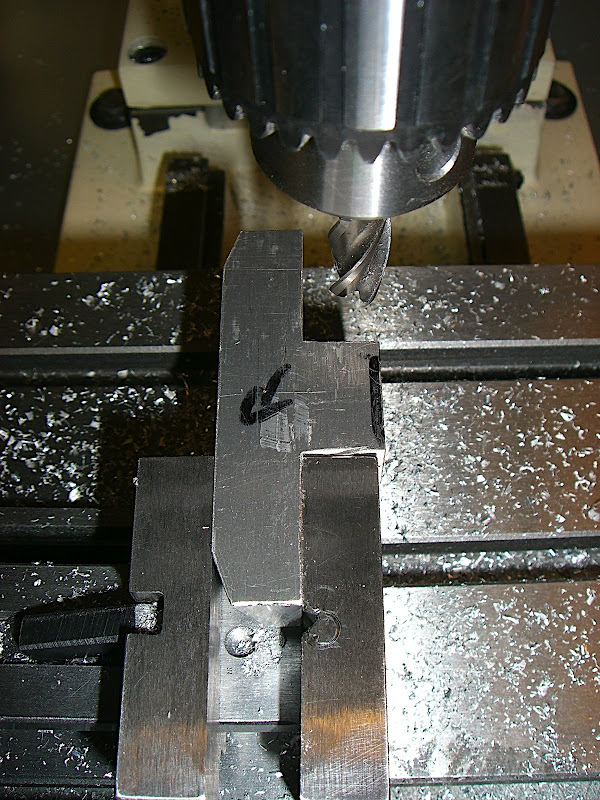
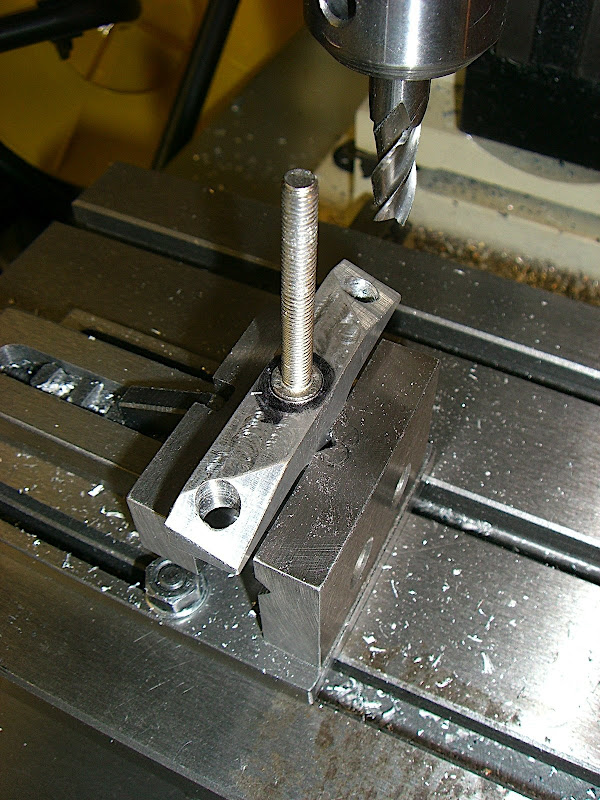
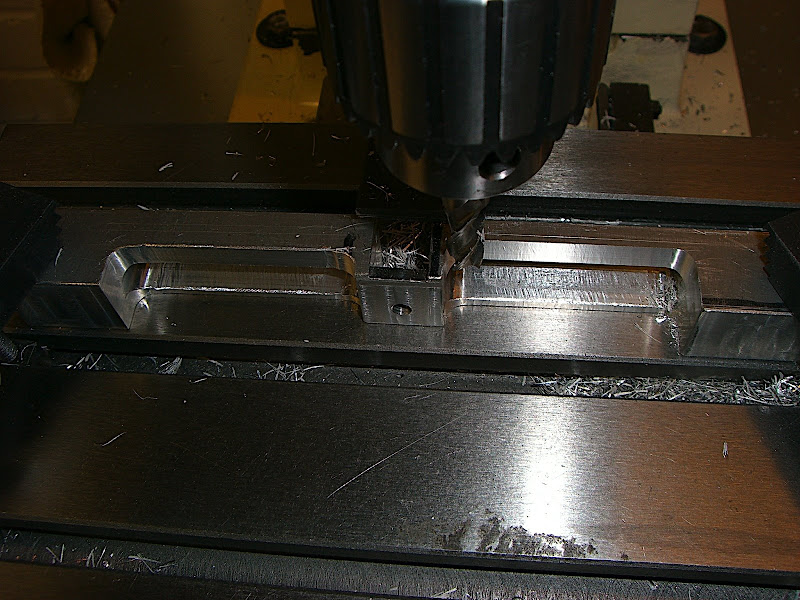
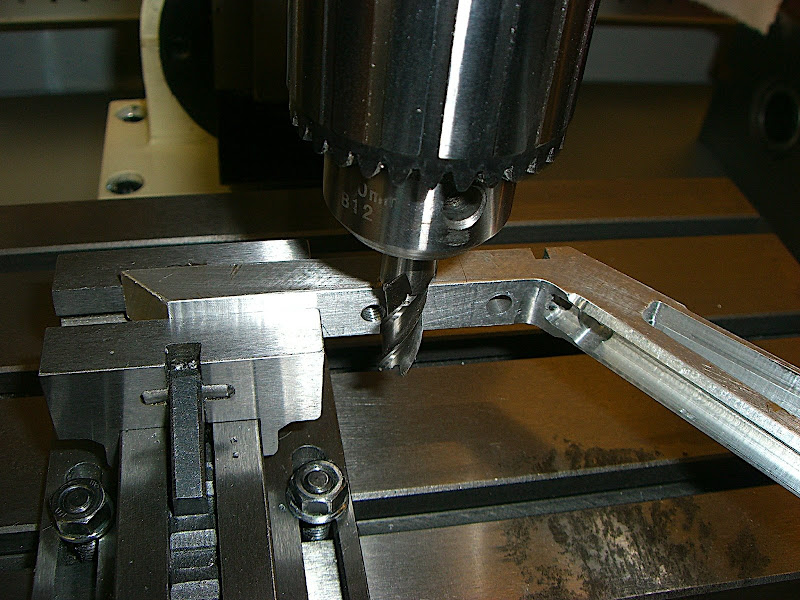
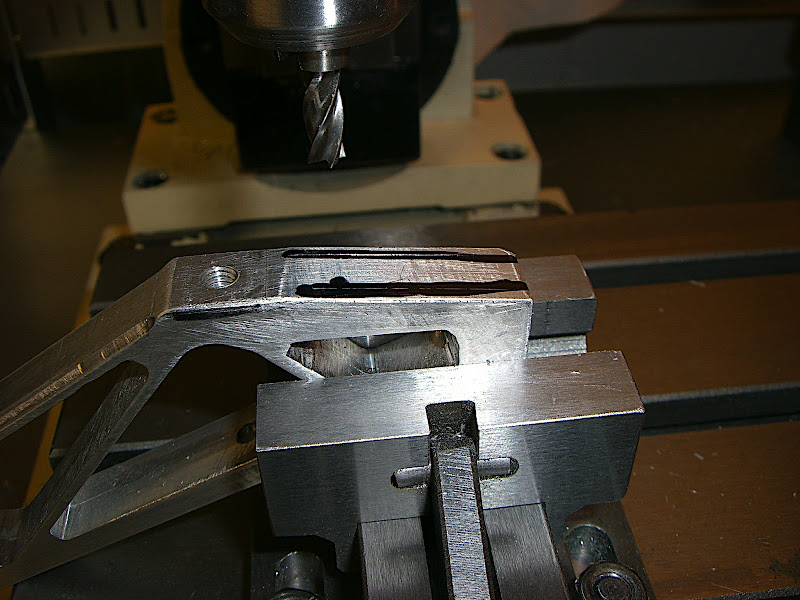
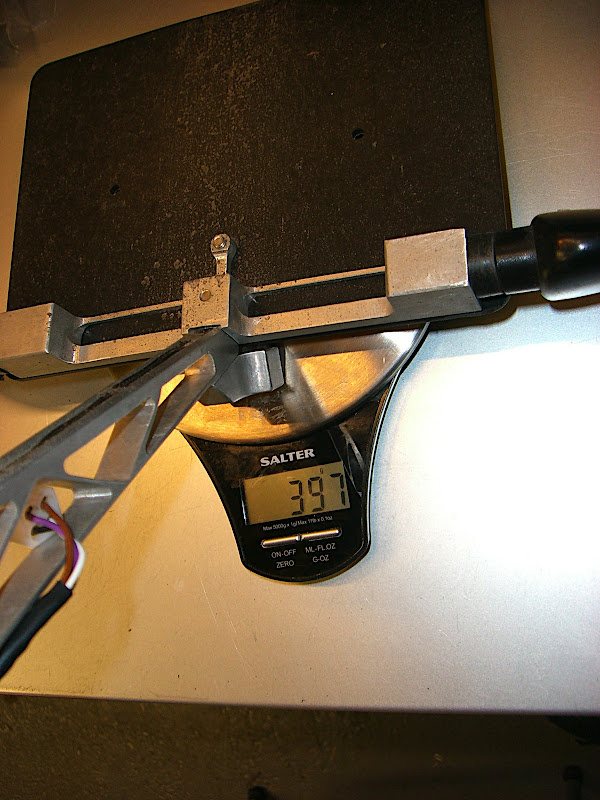
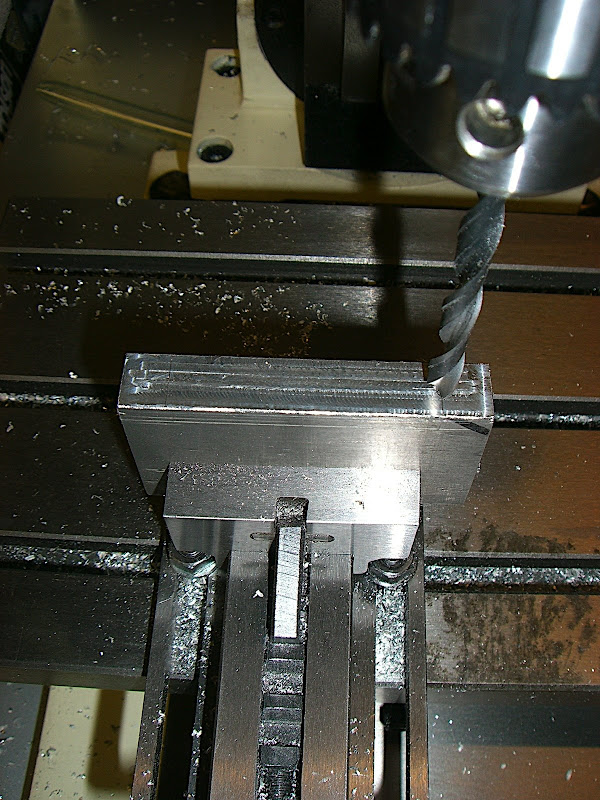
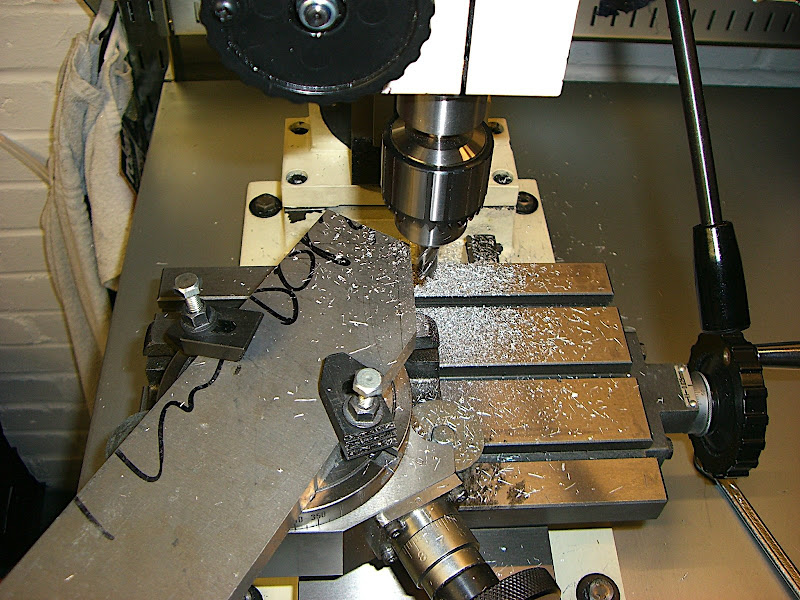
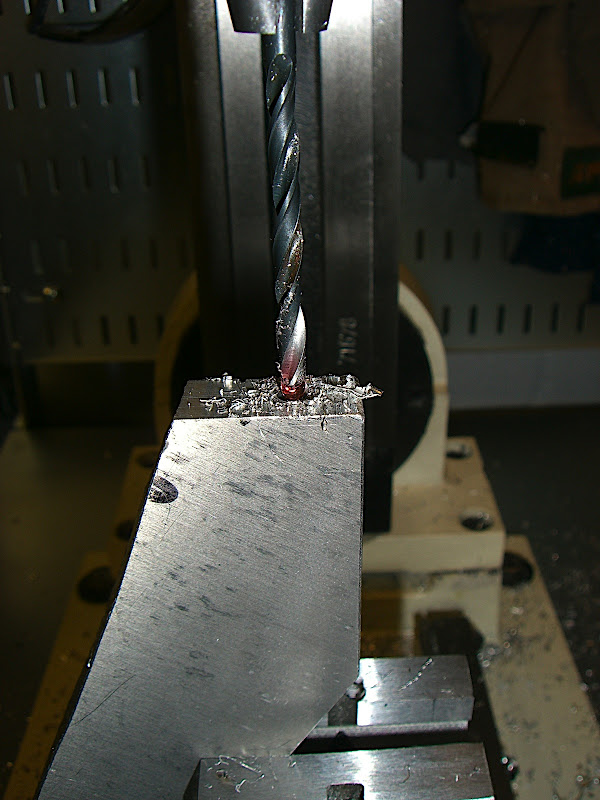
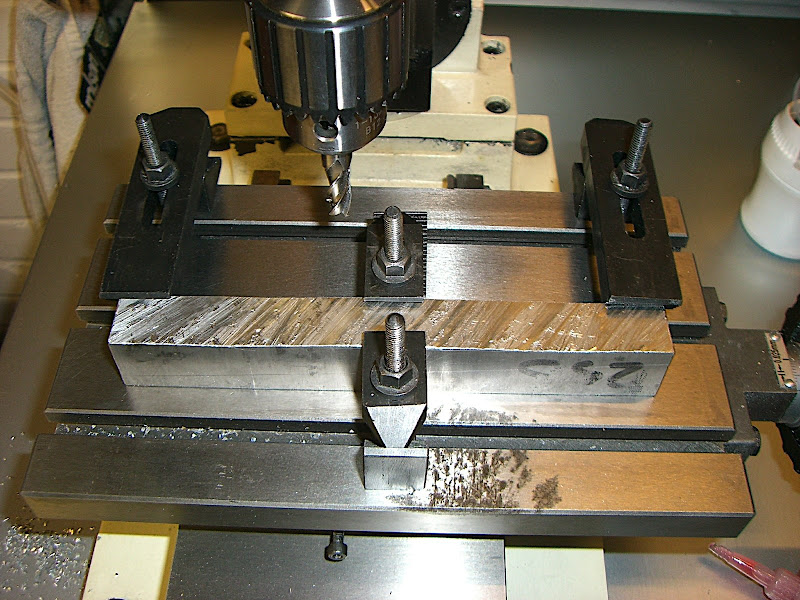
Starting to drill the holes into the rear holder
Image

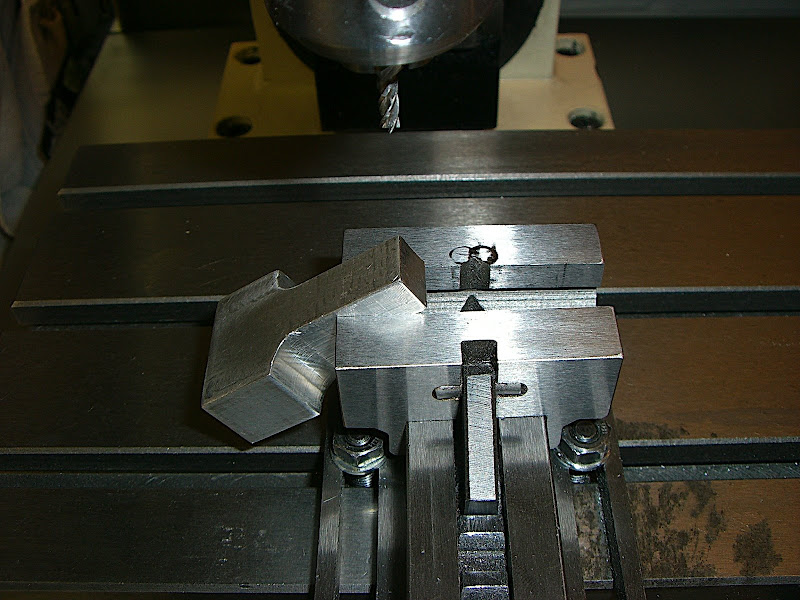
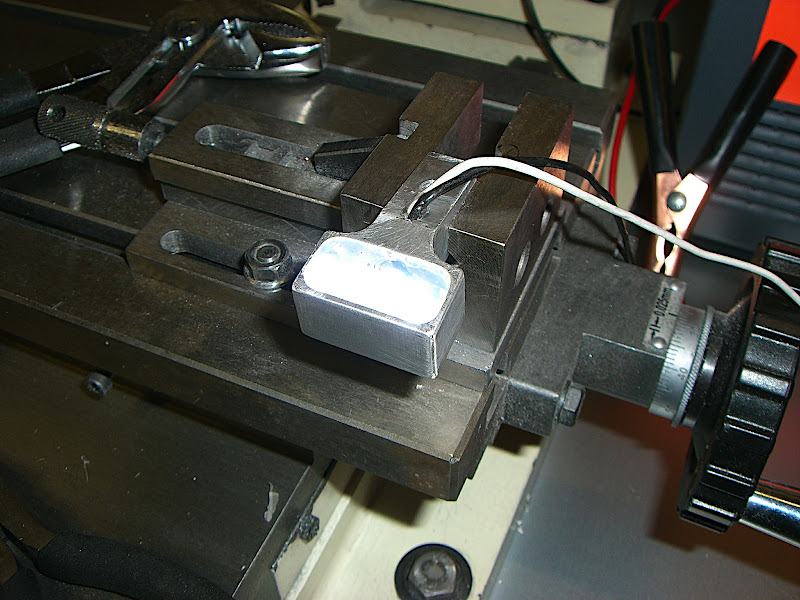
The rear holder needs to be angled...
Image

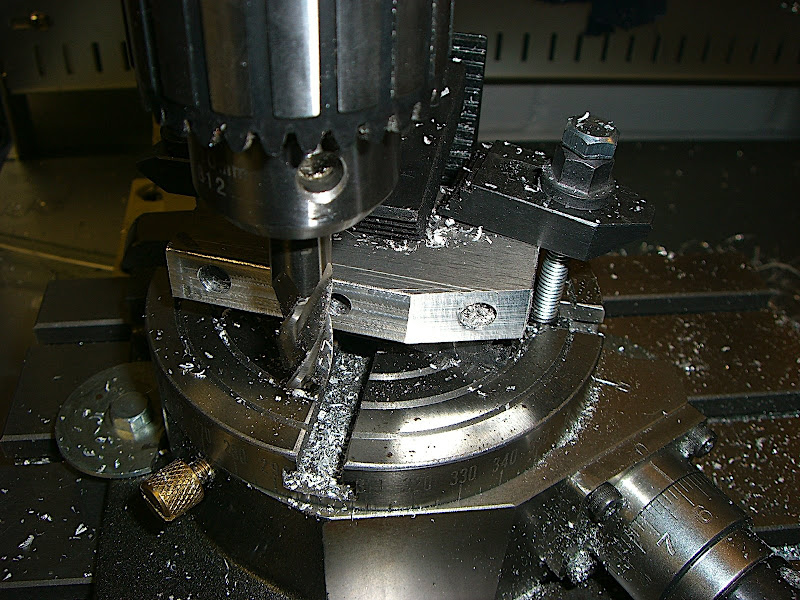
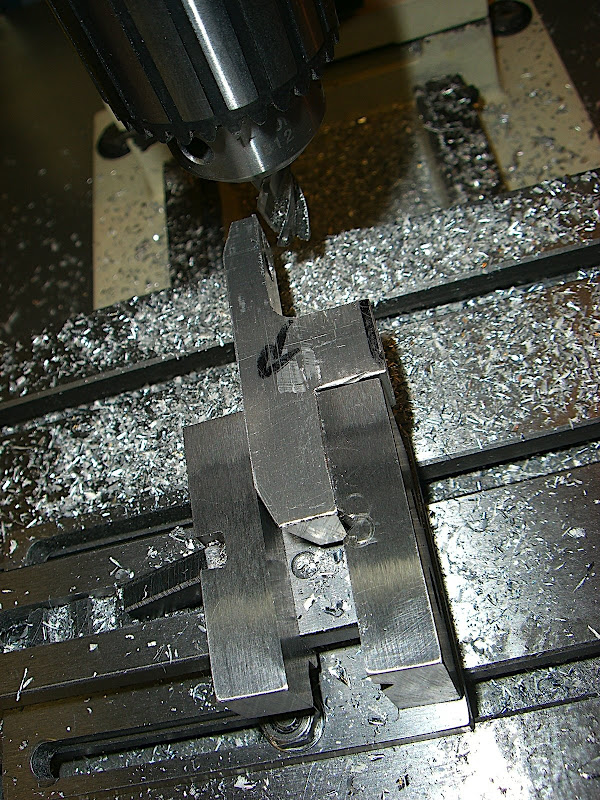
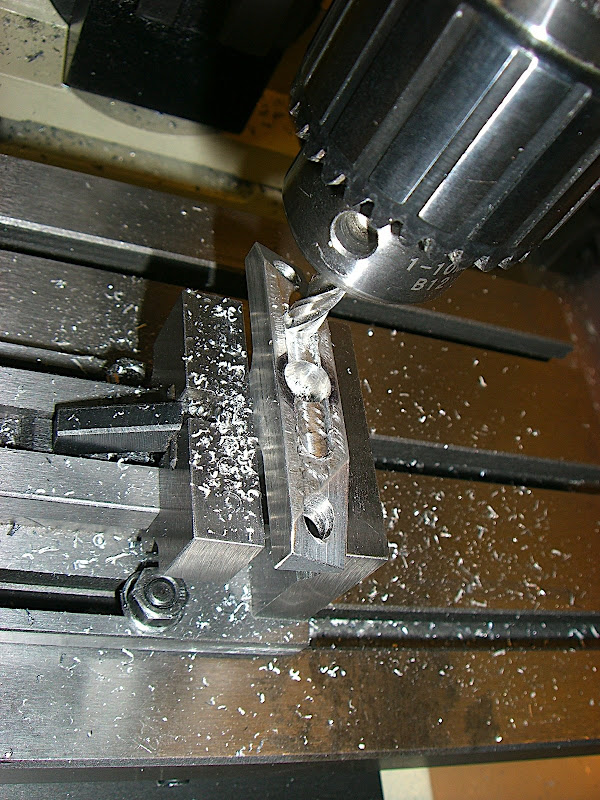
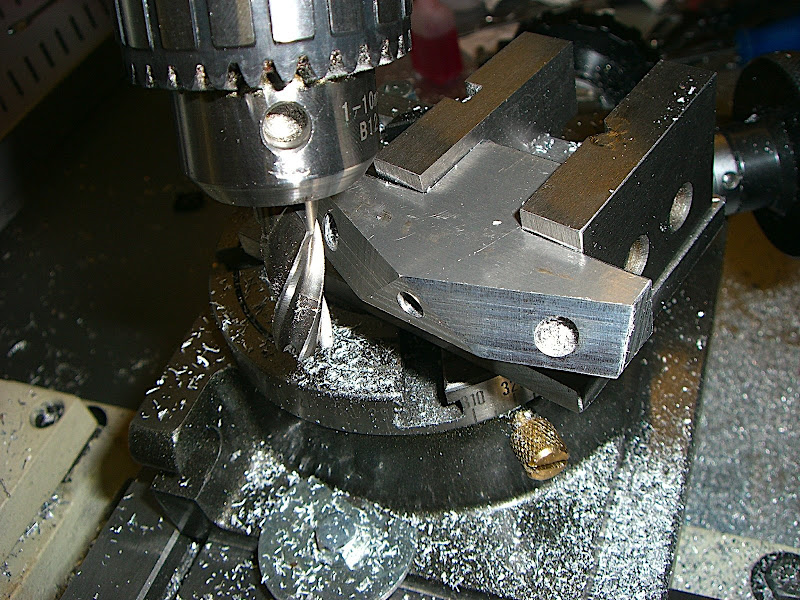
What I didn't realise was that it also needed to be angled in the other direction too. More milling!
Image

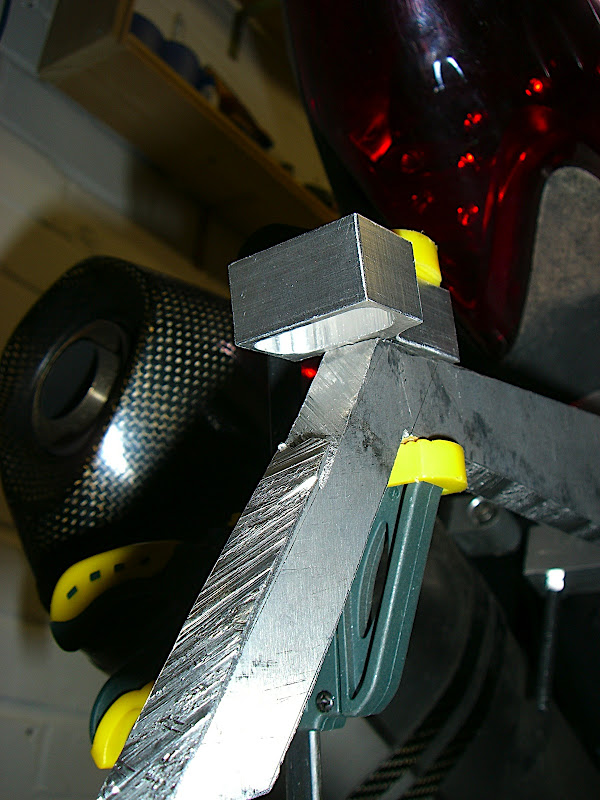
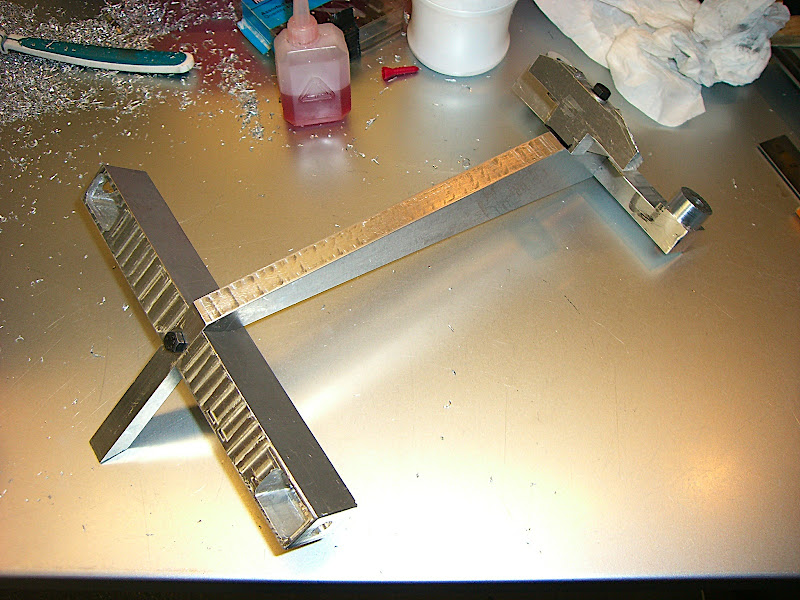
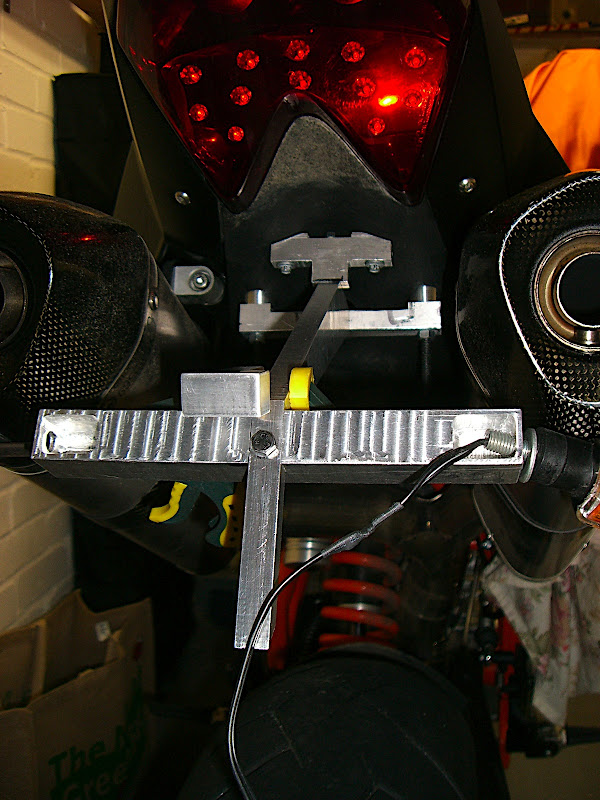
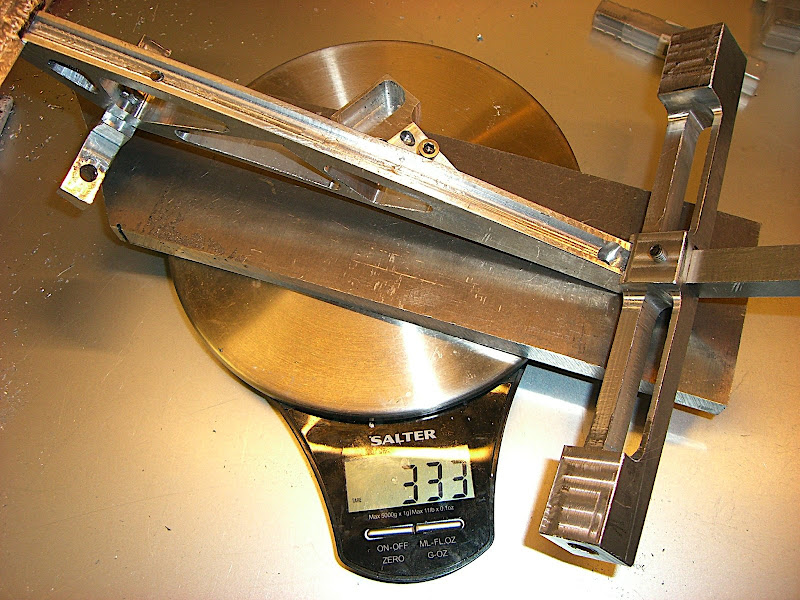
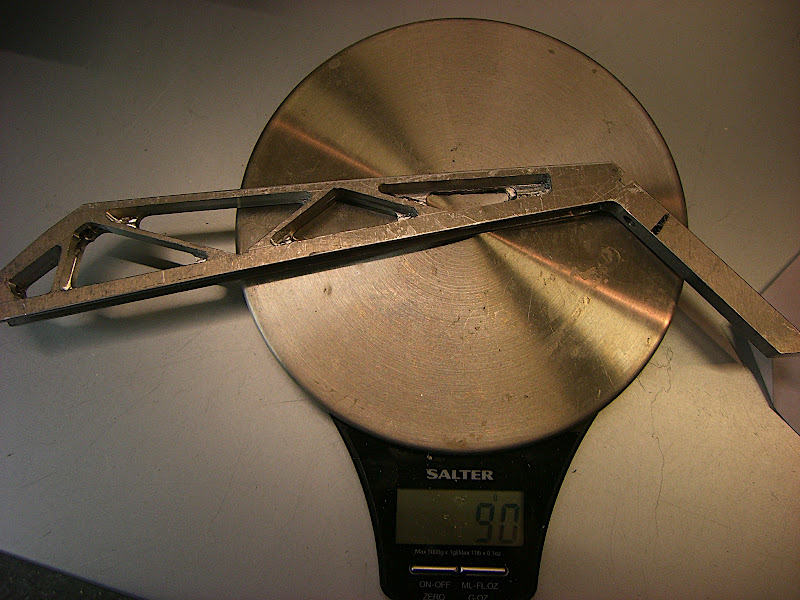
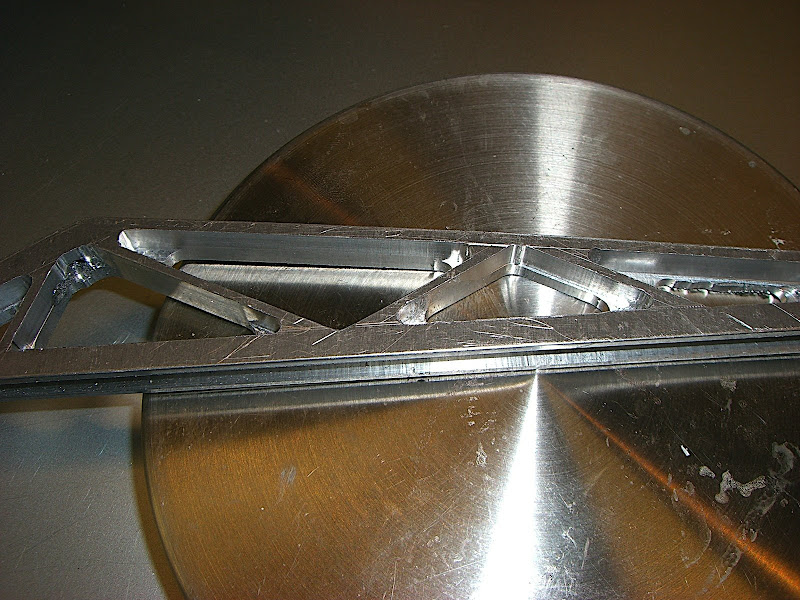
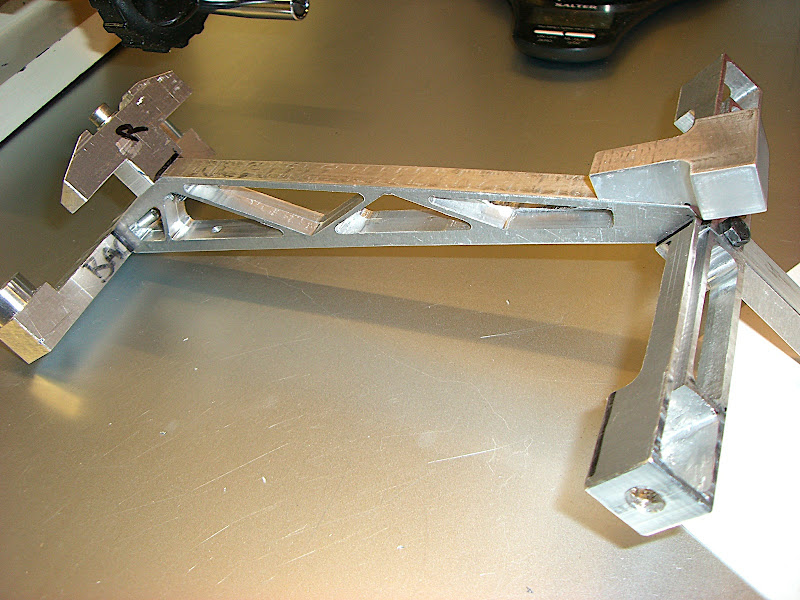
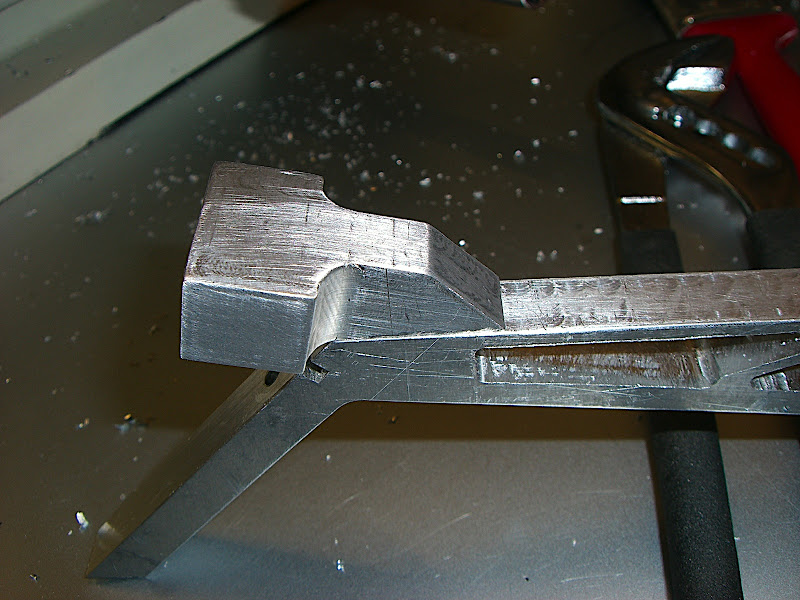
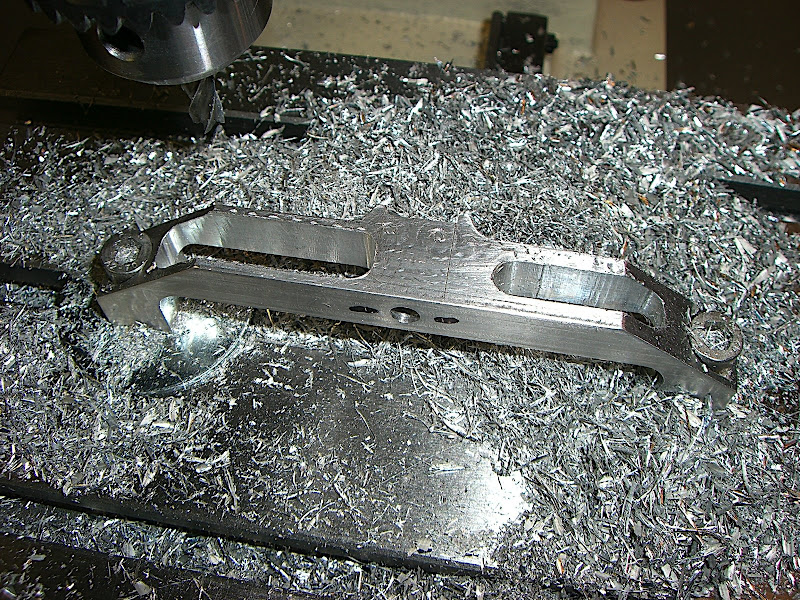
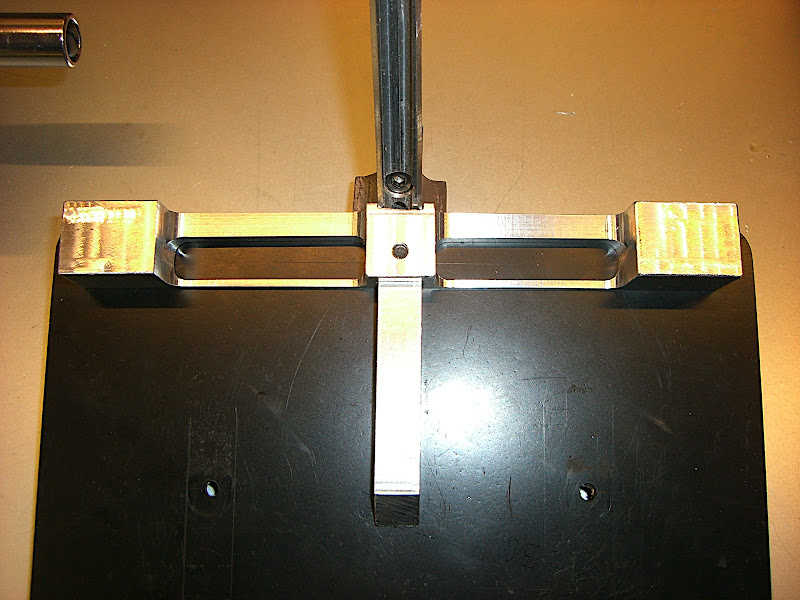
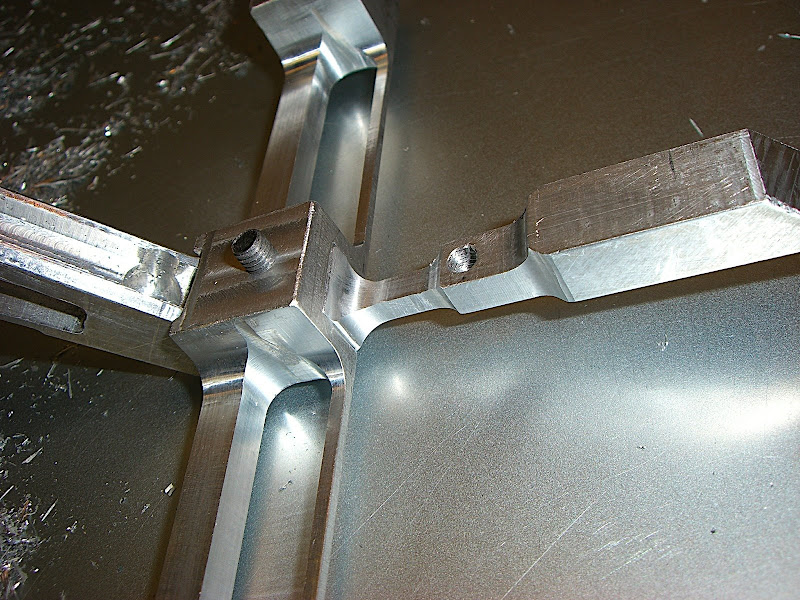
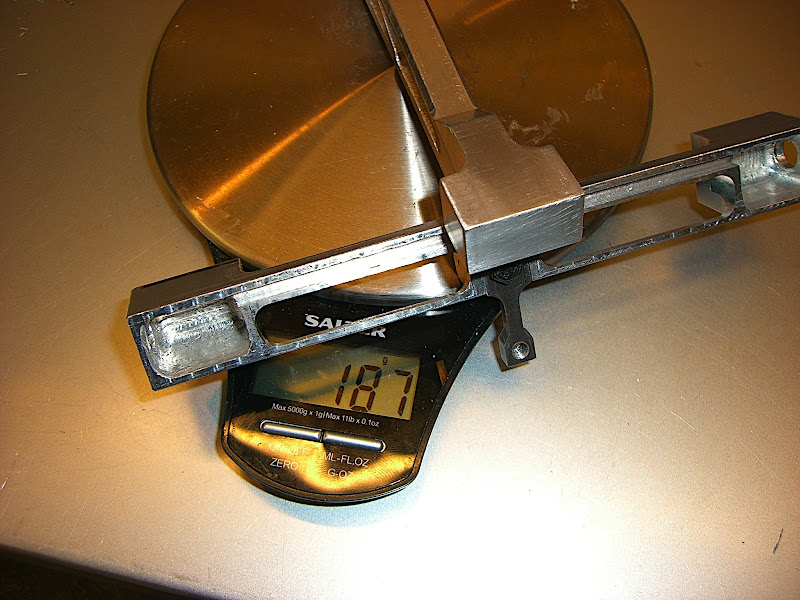
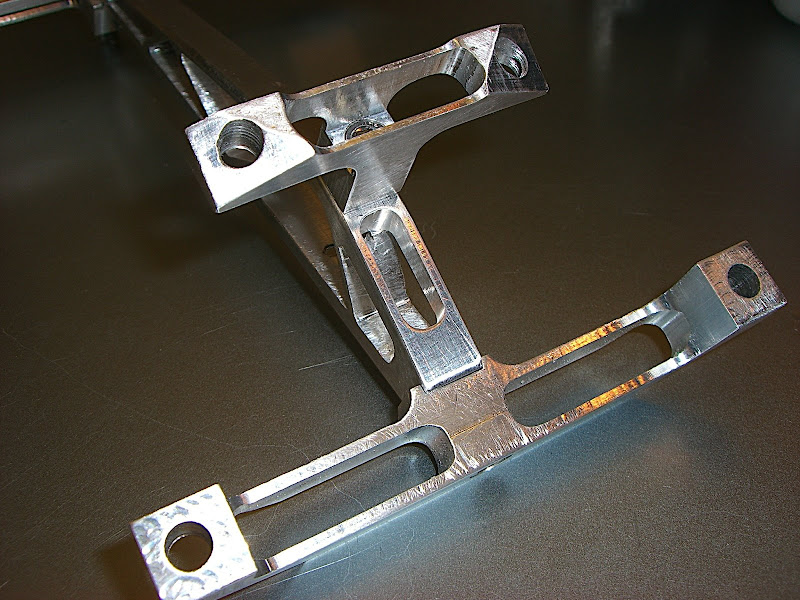
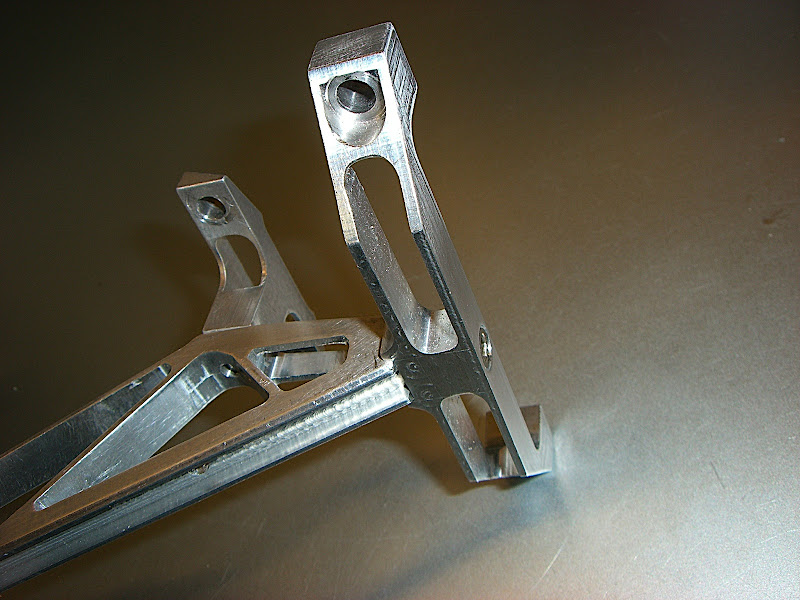
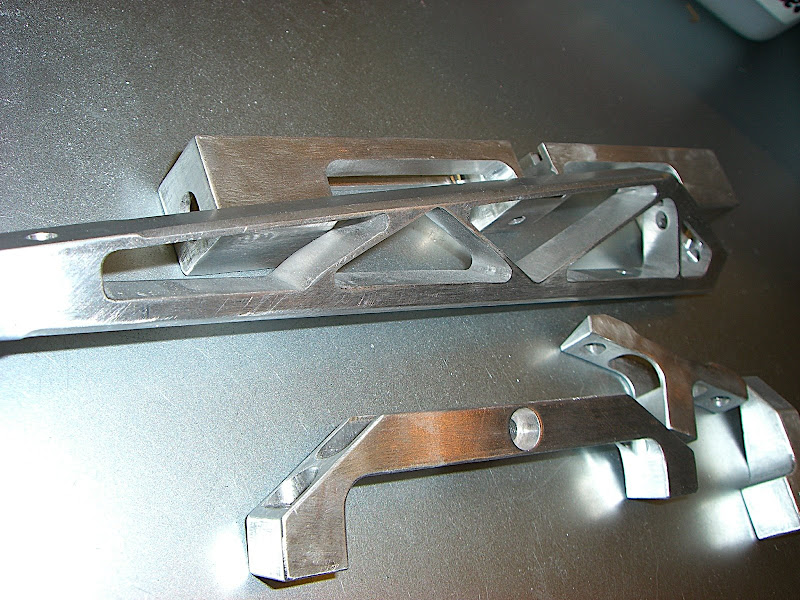
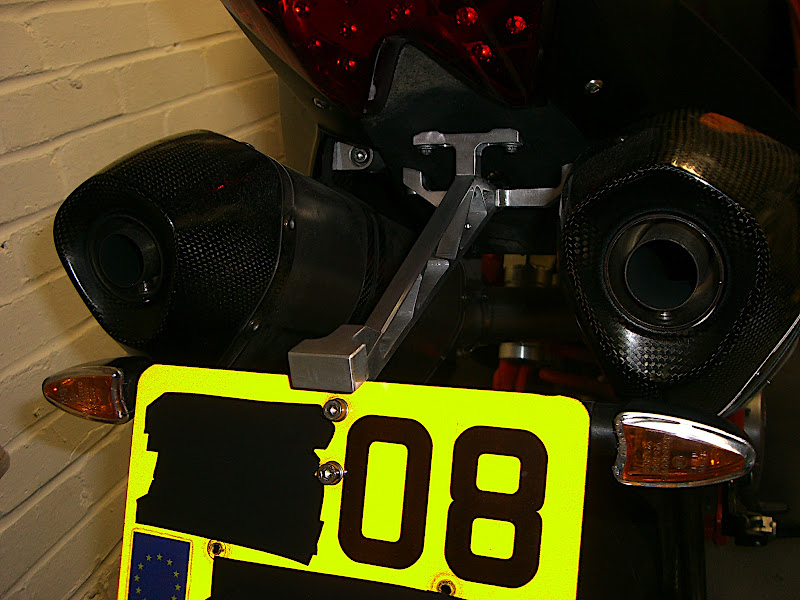
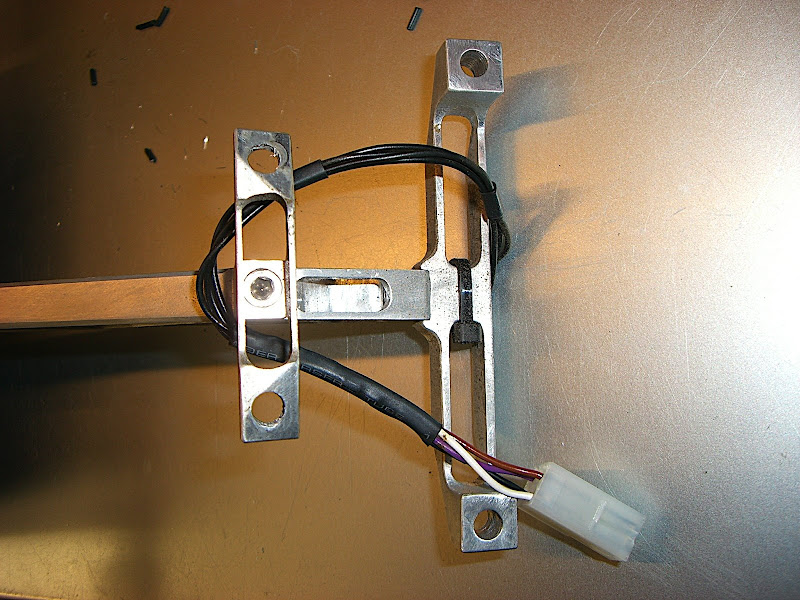
Here's the first assembly of the rough front and rear holders
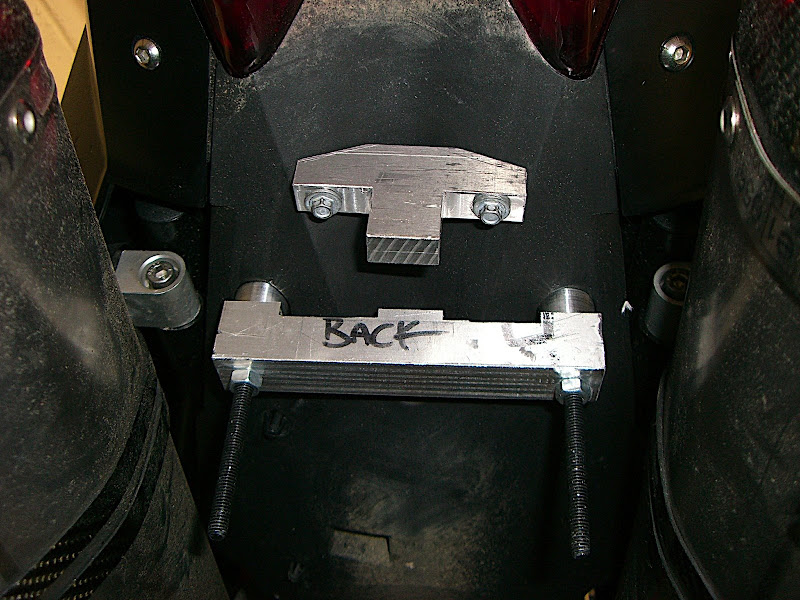
Image

From the side:
Image
Note that I've tried to keep as much material on the pieces so that I can hopefully shape them into something much nicer later on.

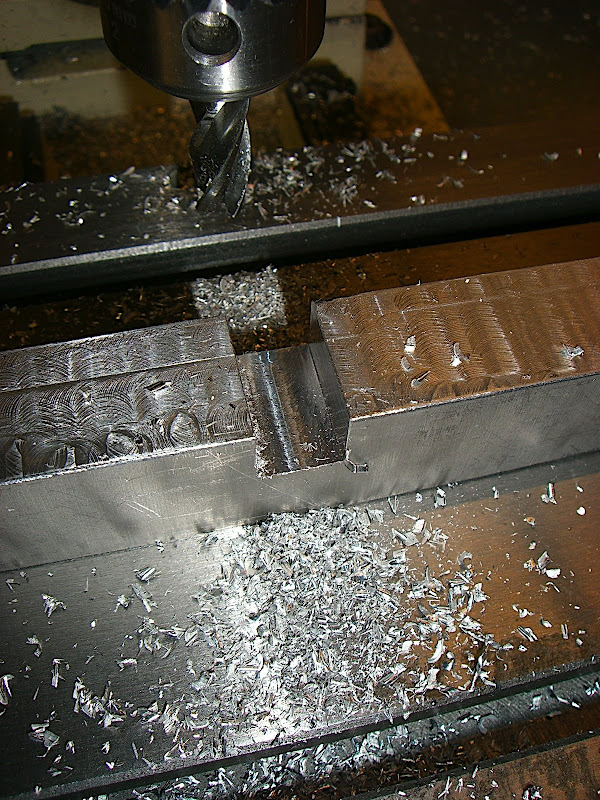
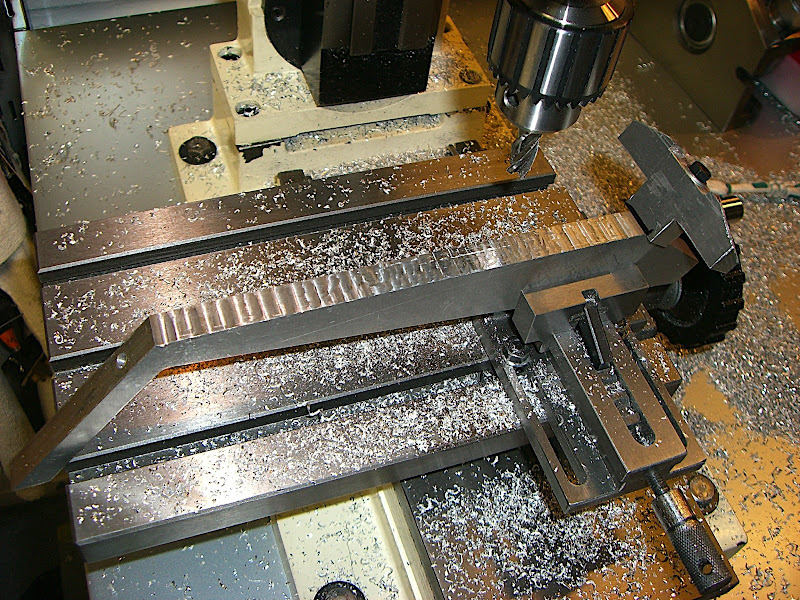
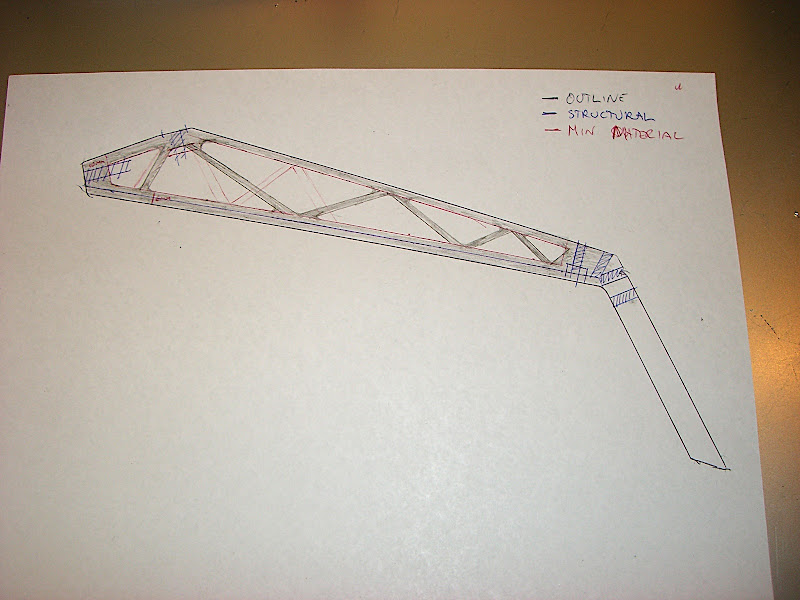
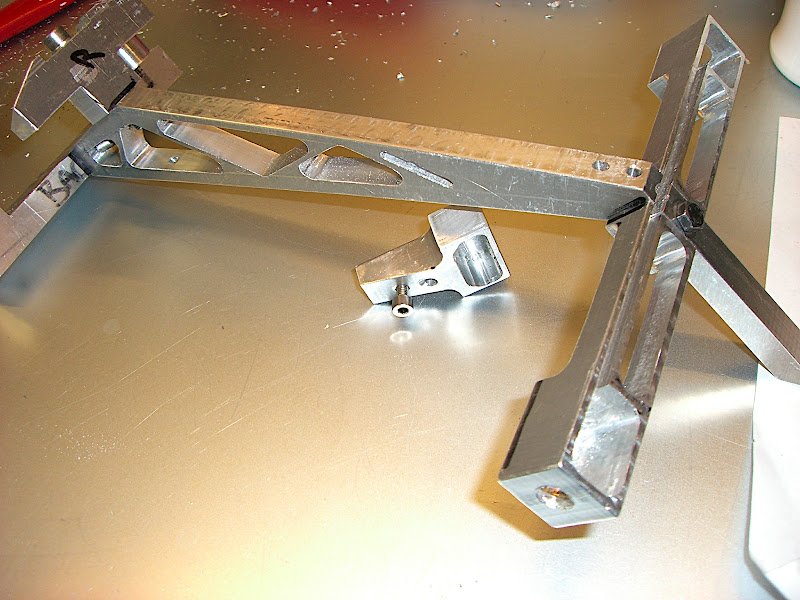
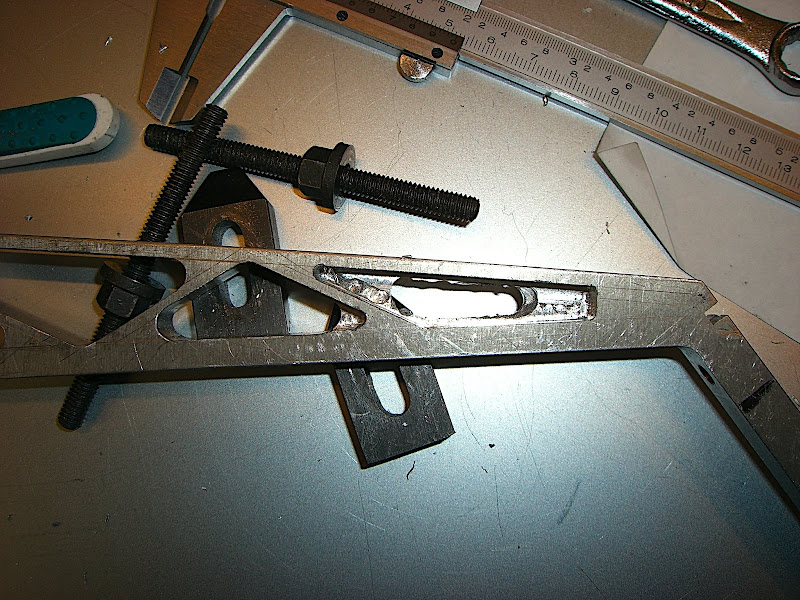
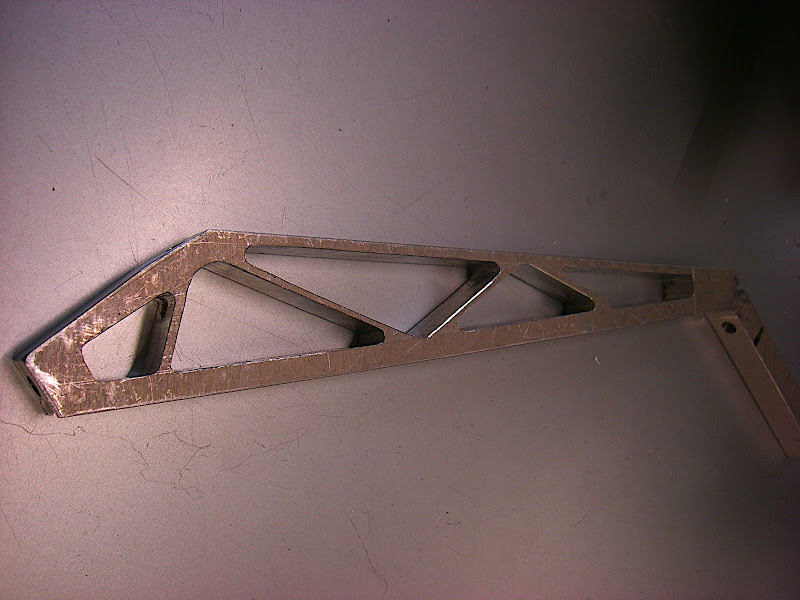
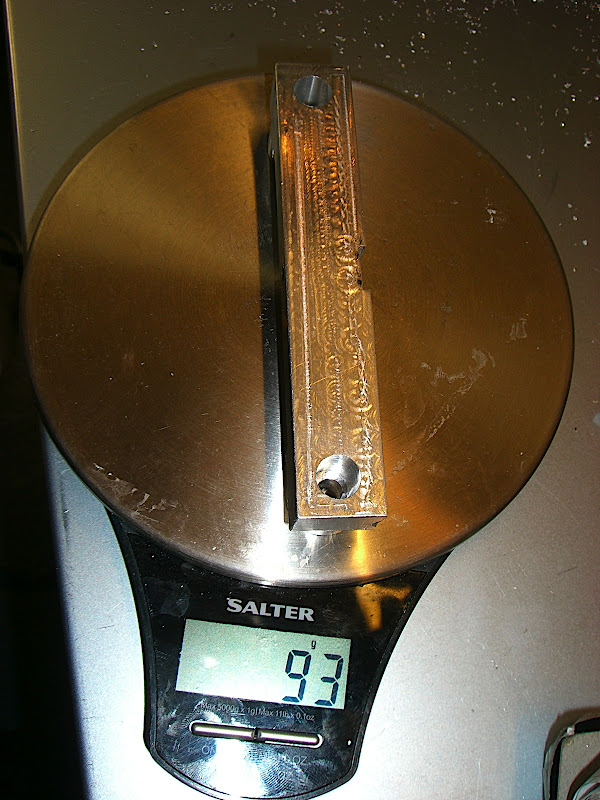
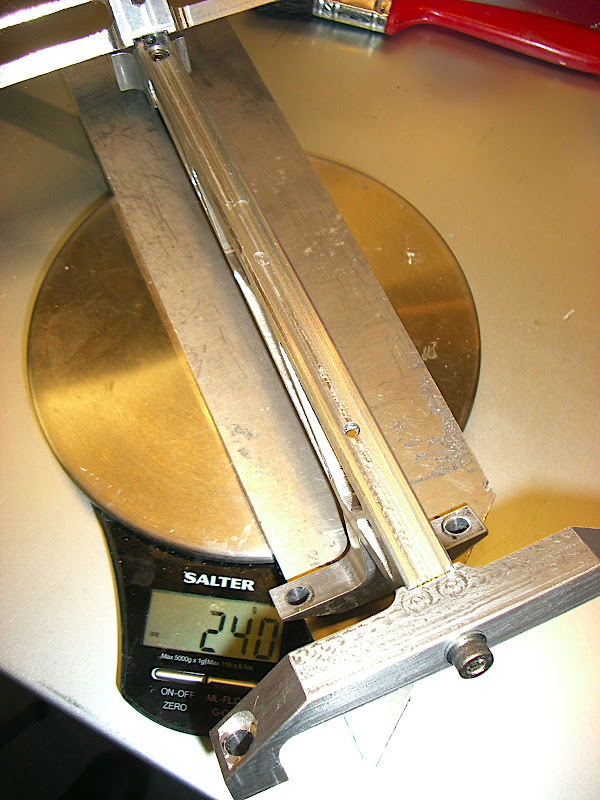
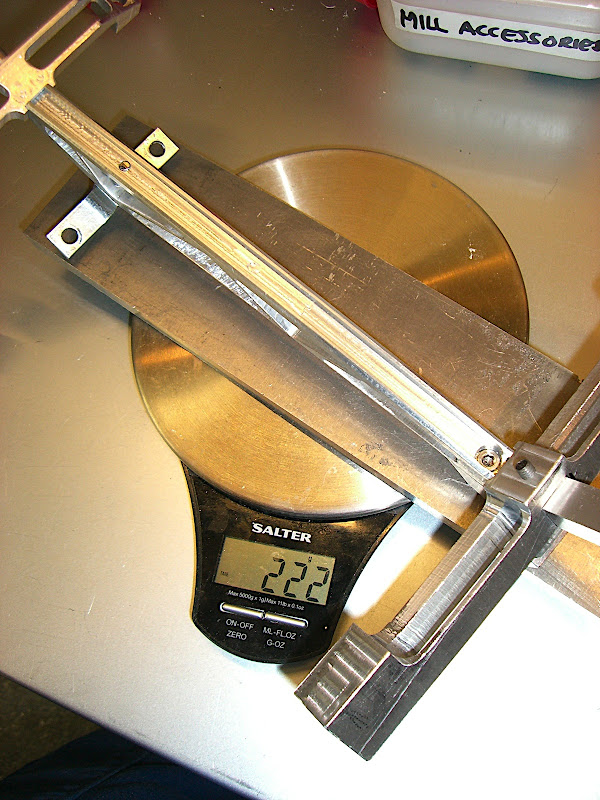
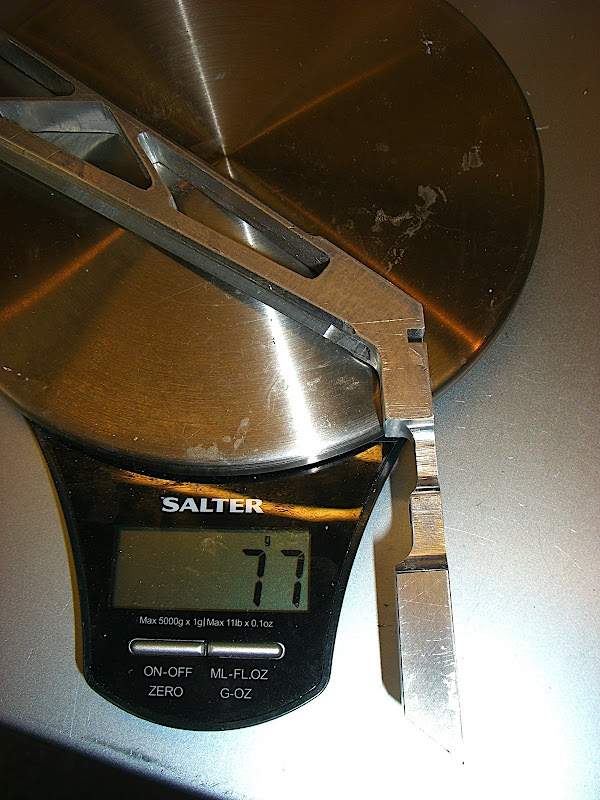
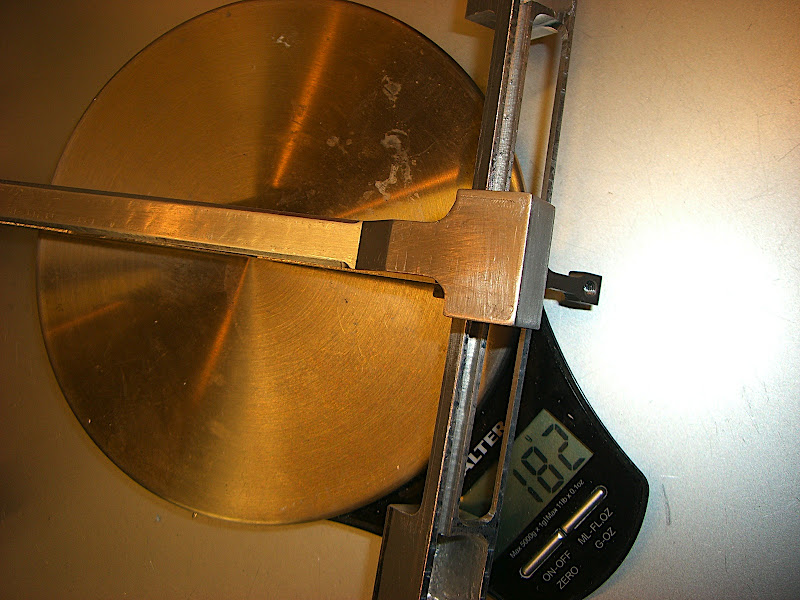
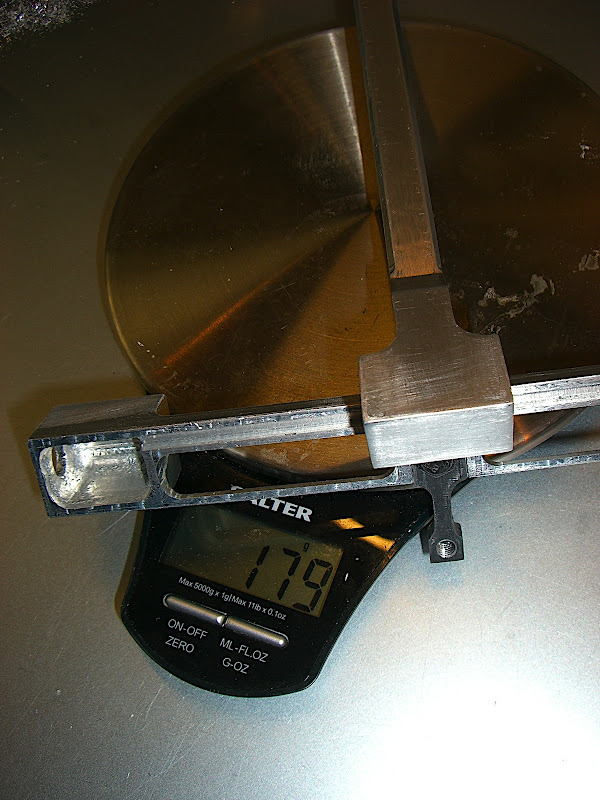
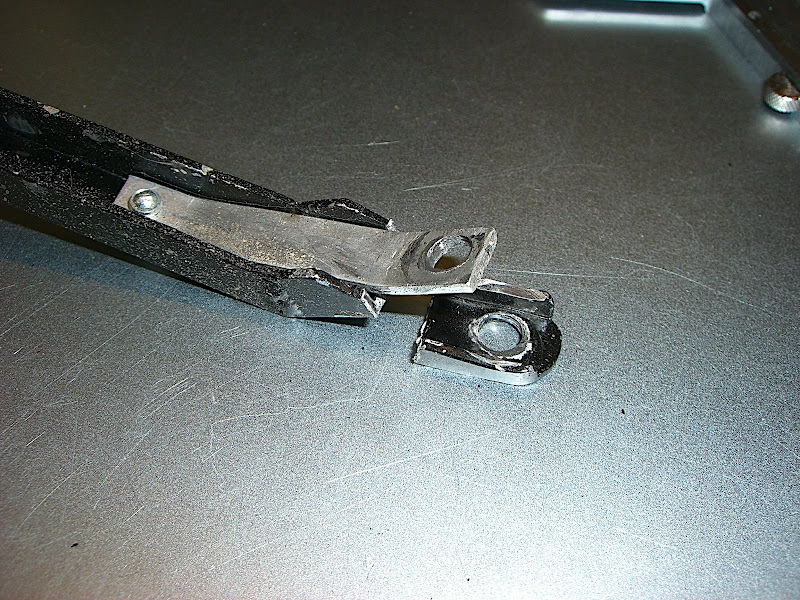
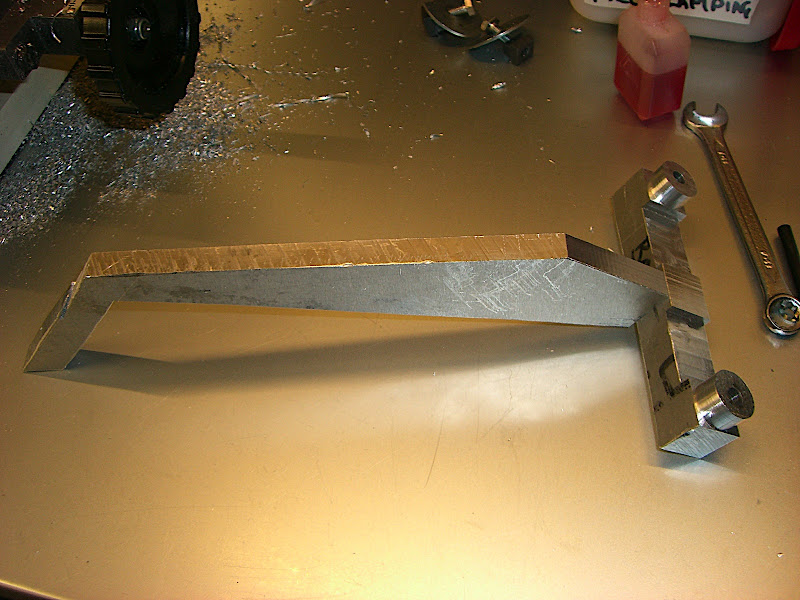
Starting on the arm. Down is at the left, and rear is down. If that makes sense.
Image
The first step was to get the angle right.

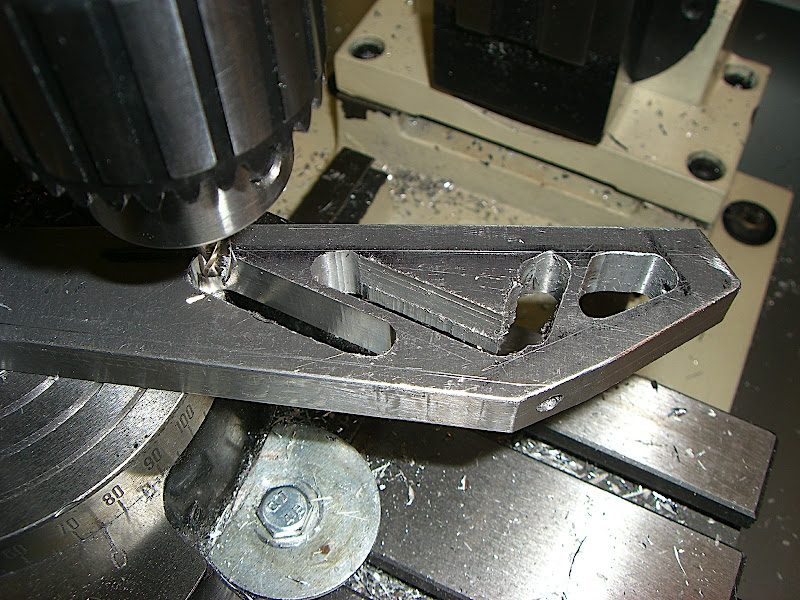
Then a lot of cutting with the saw to get the generic shape
Image

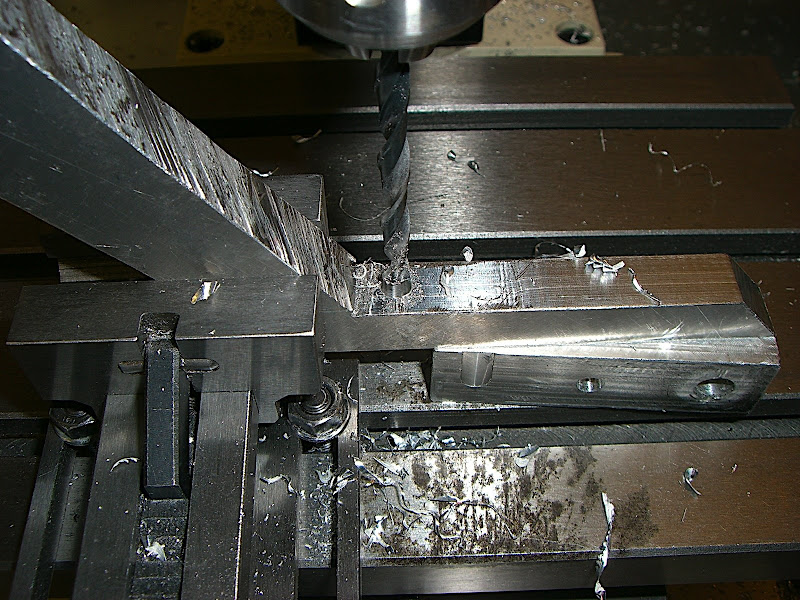
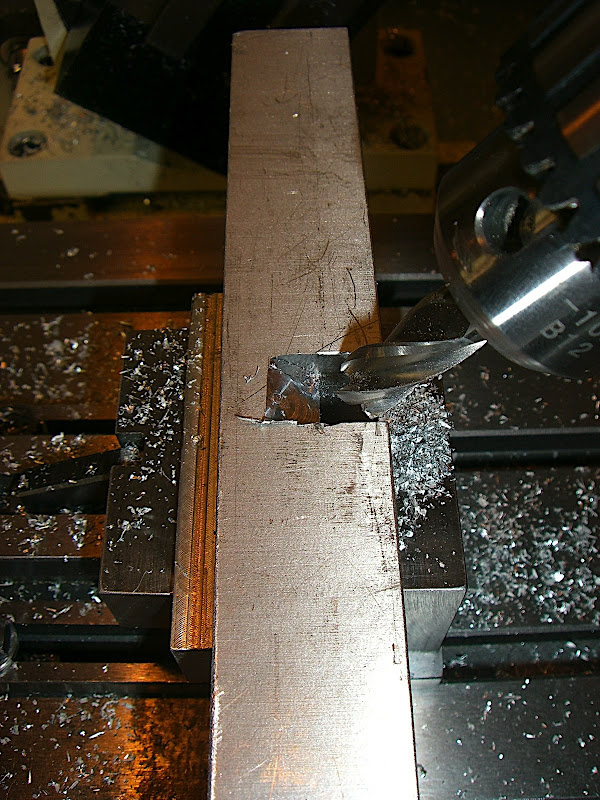
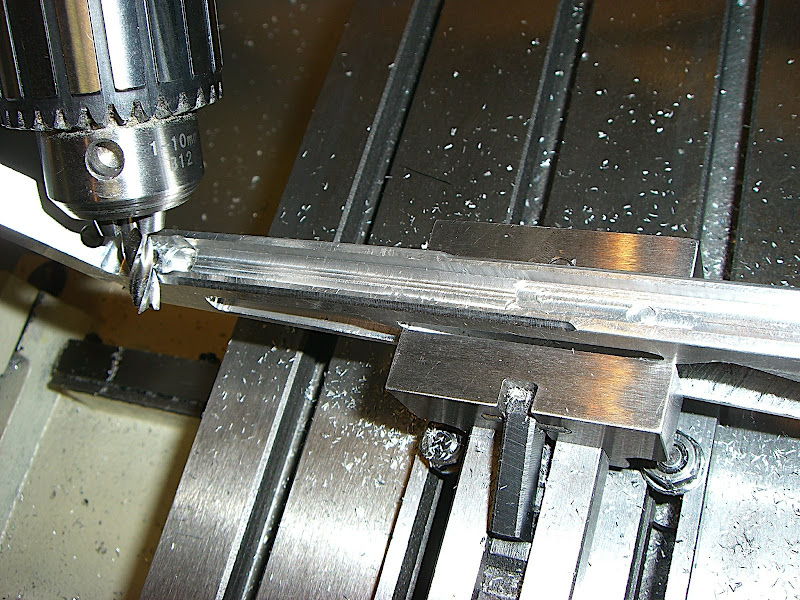
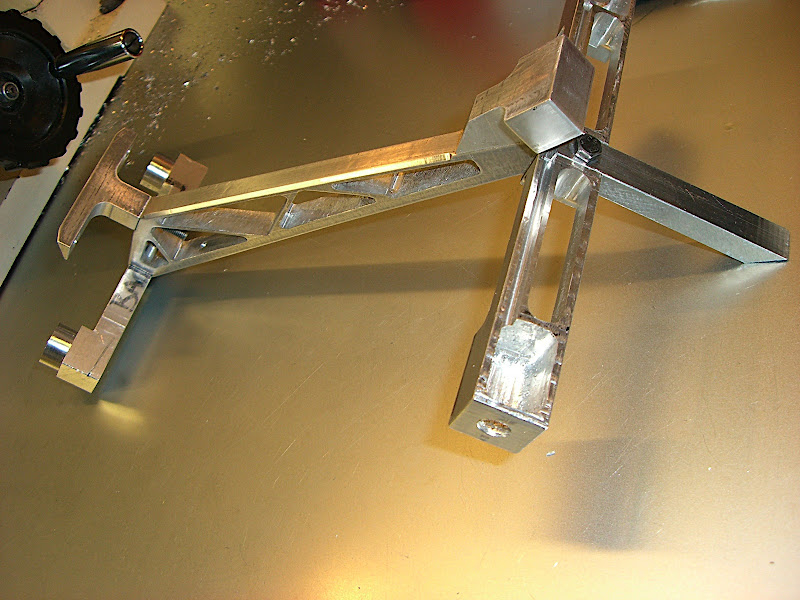
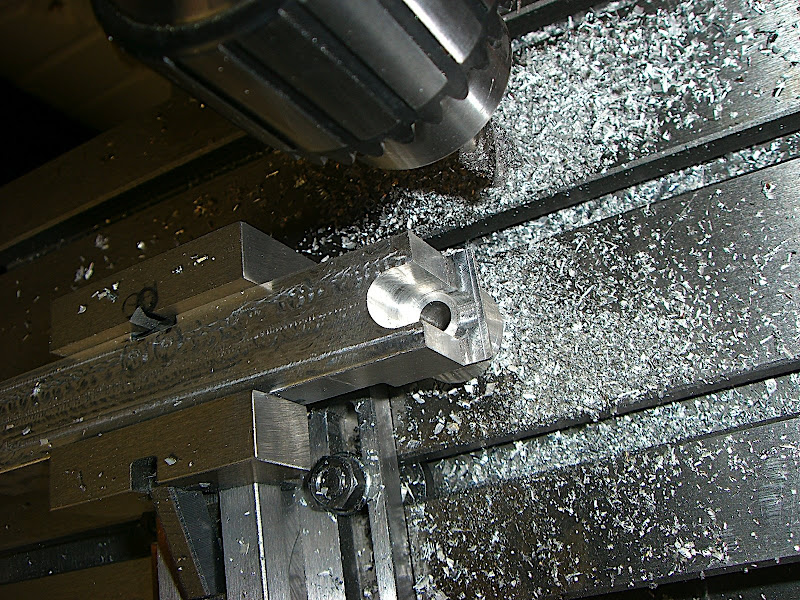
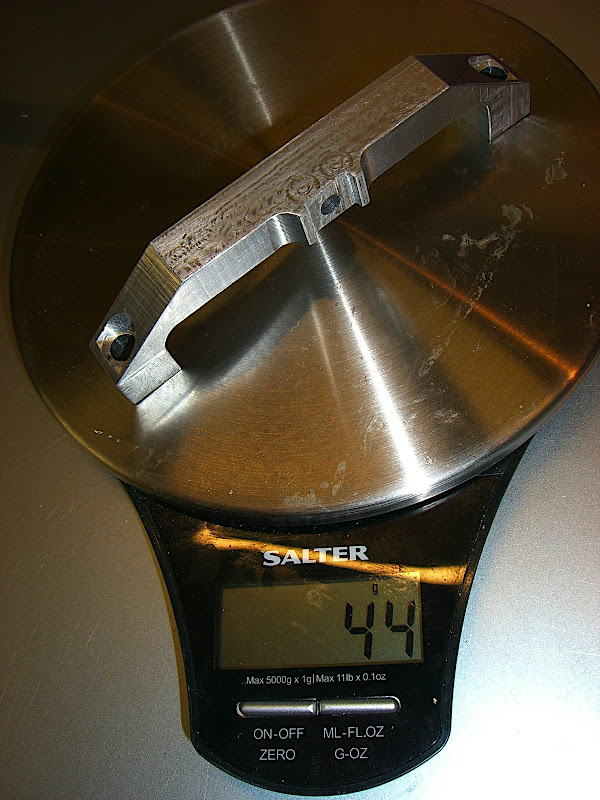
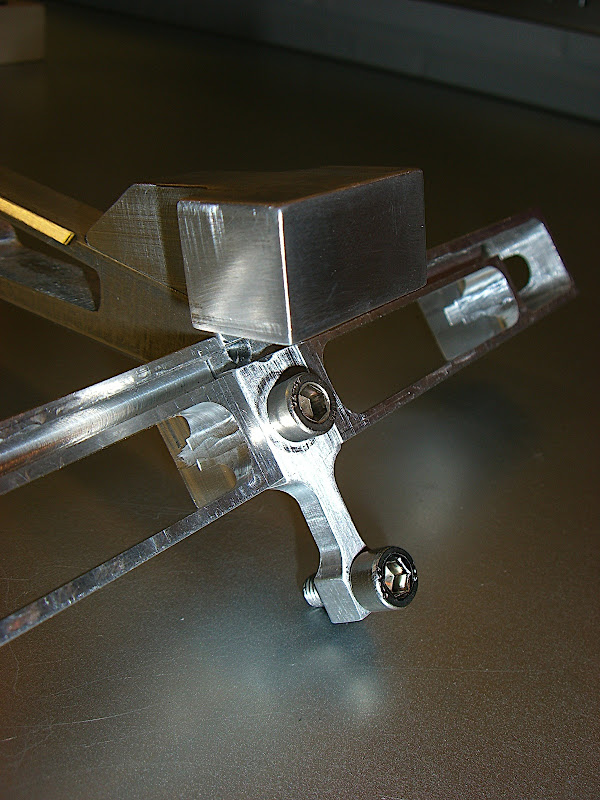
Then drilling and tapping the end hole of the arm. This attaches to the front holder
Image

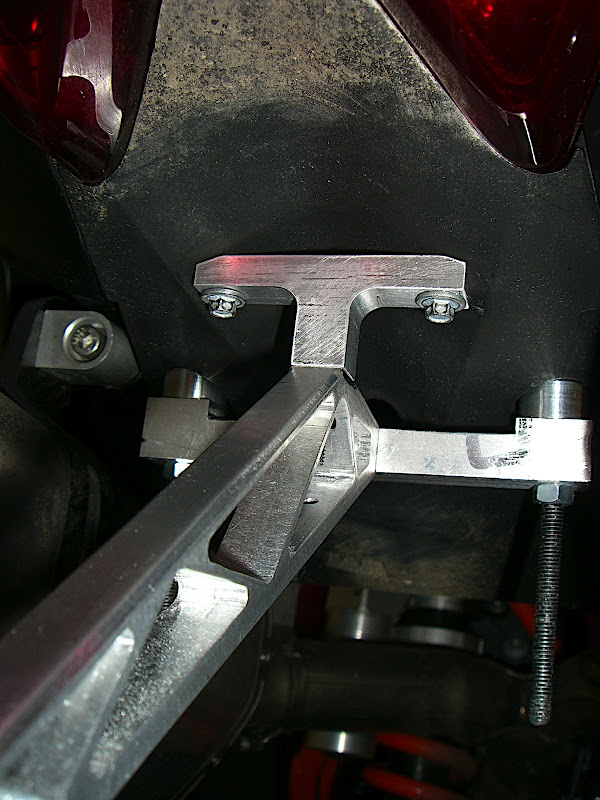
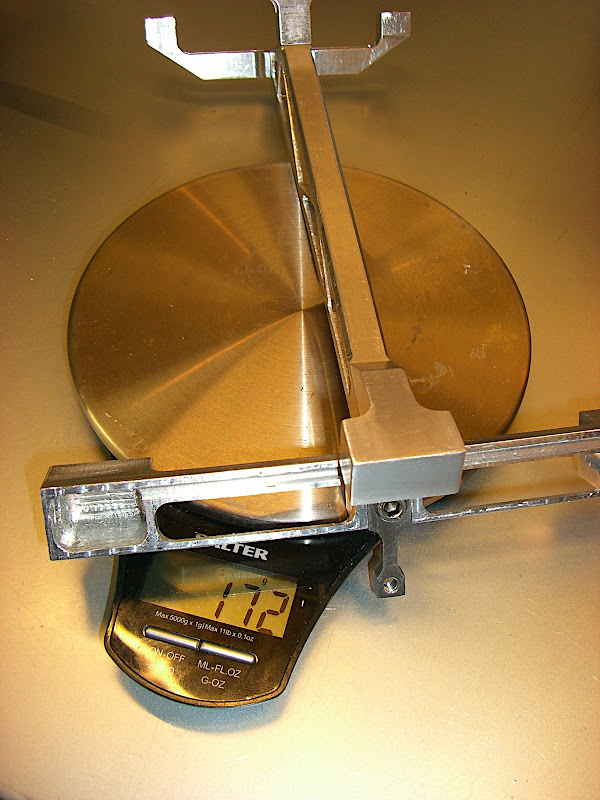
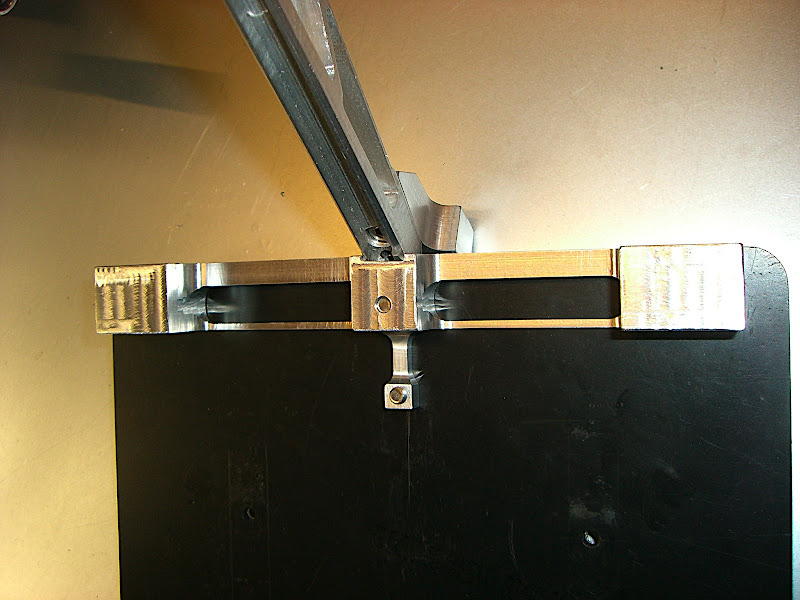
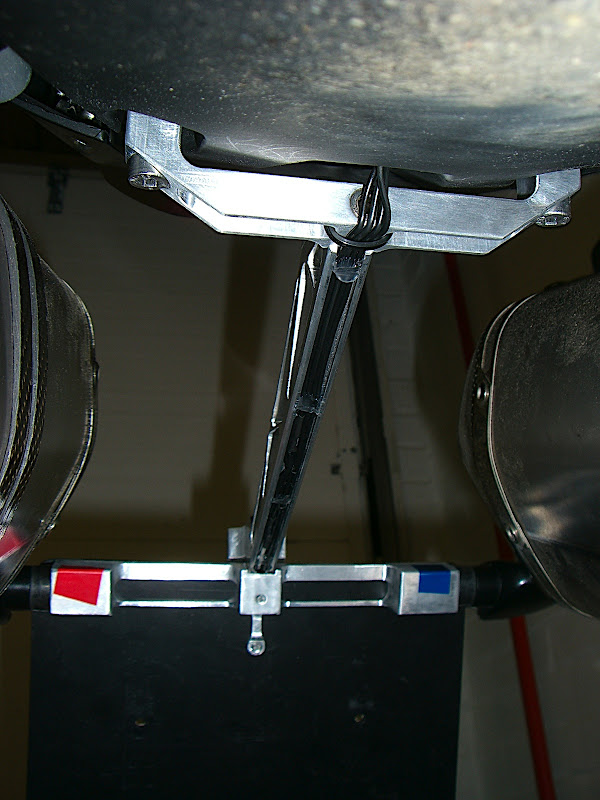
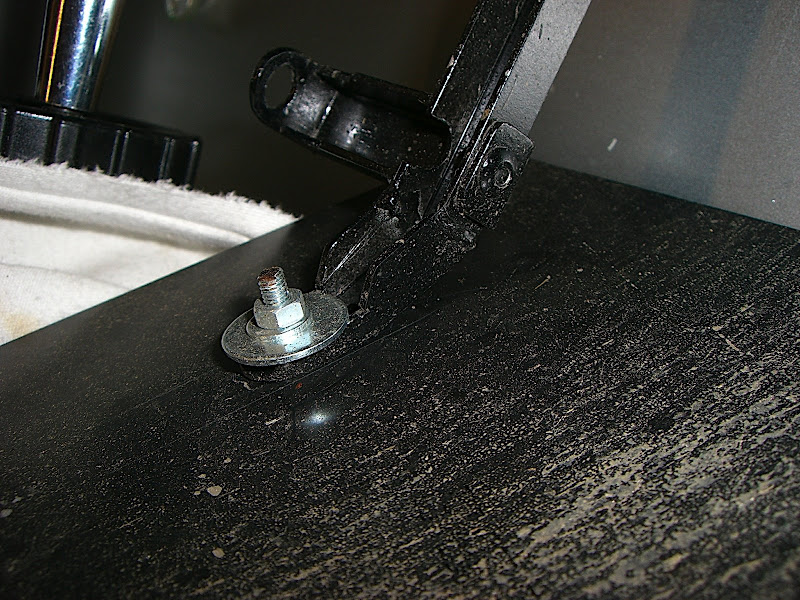
Something like this:
Image

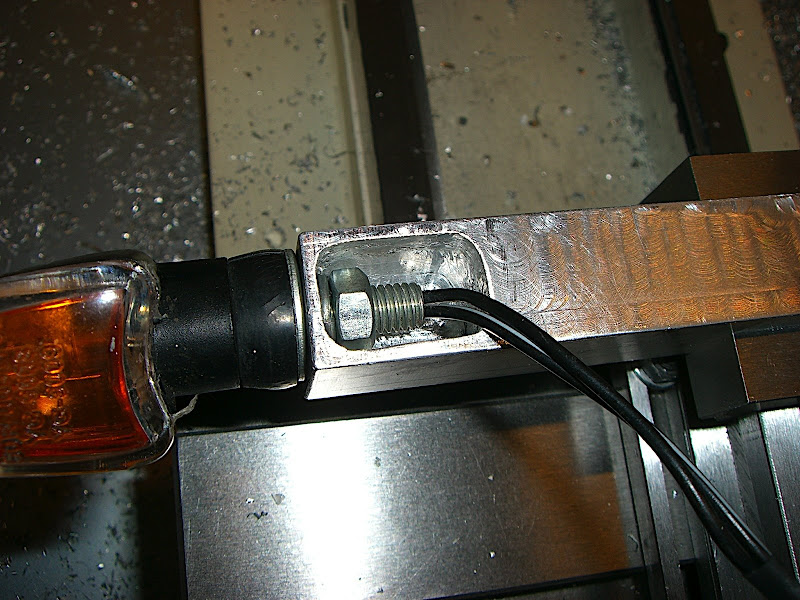
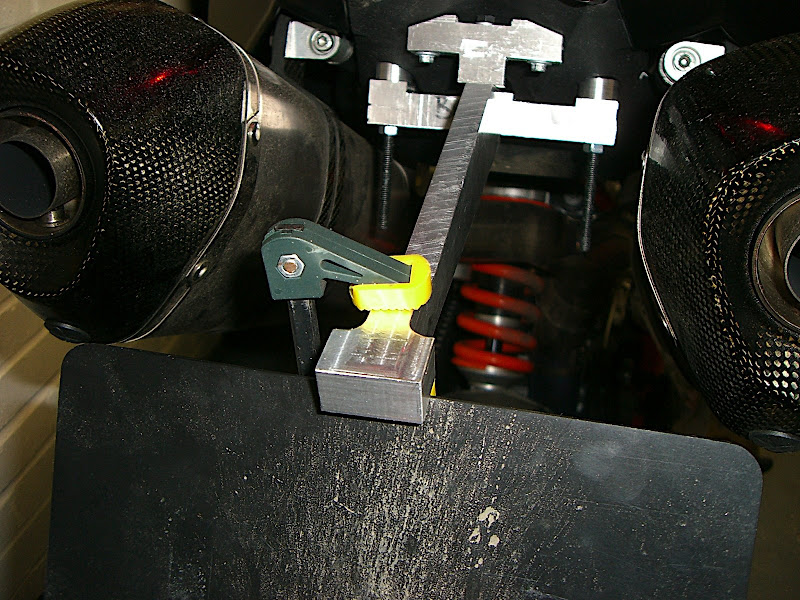
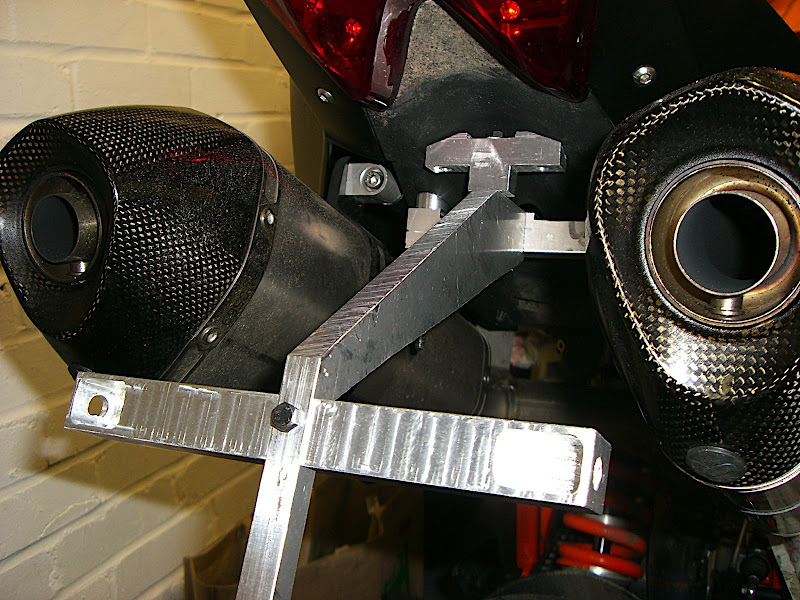
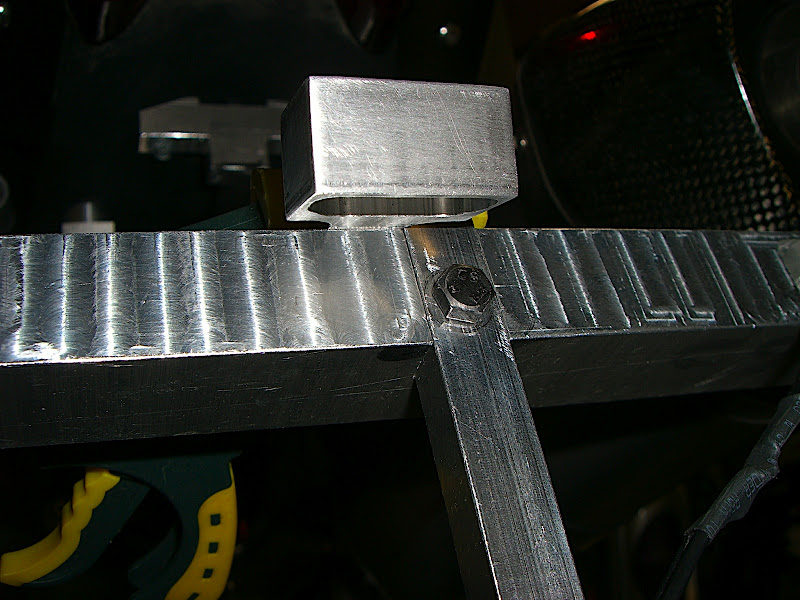
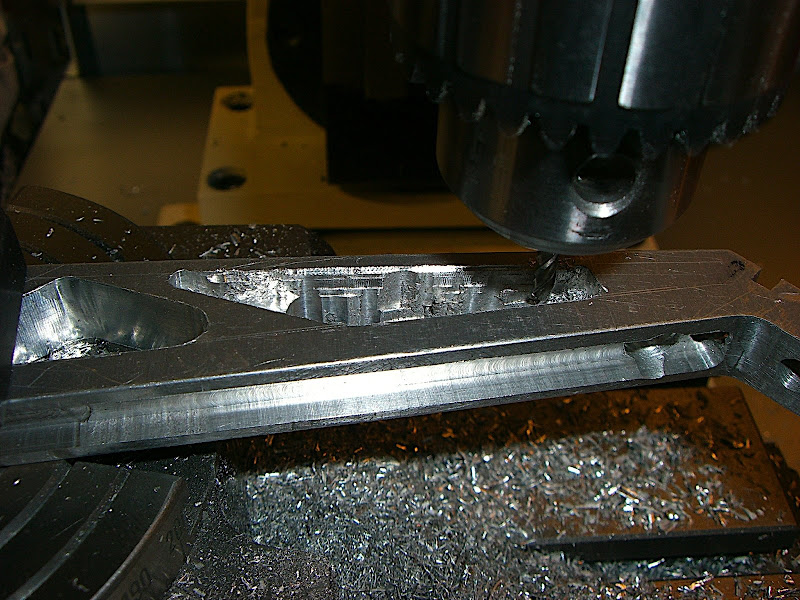
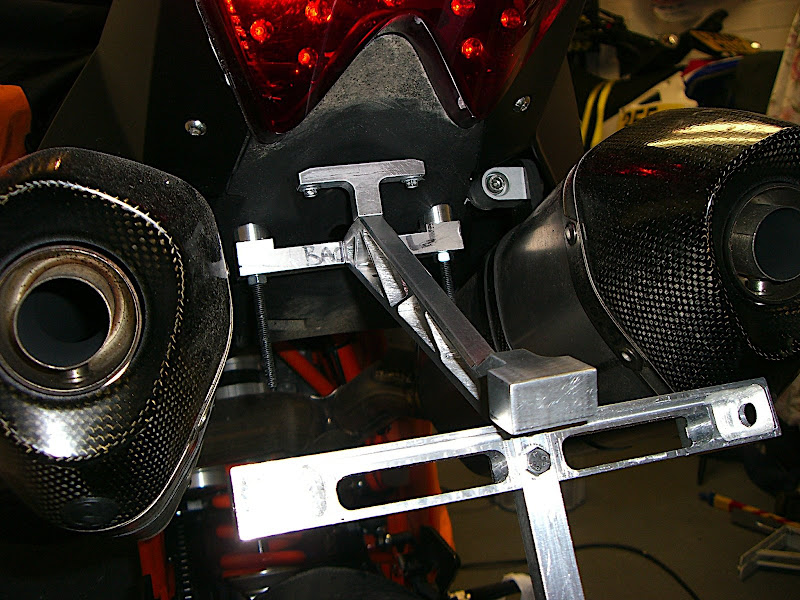
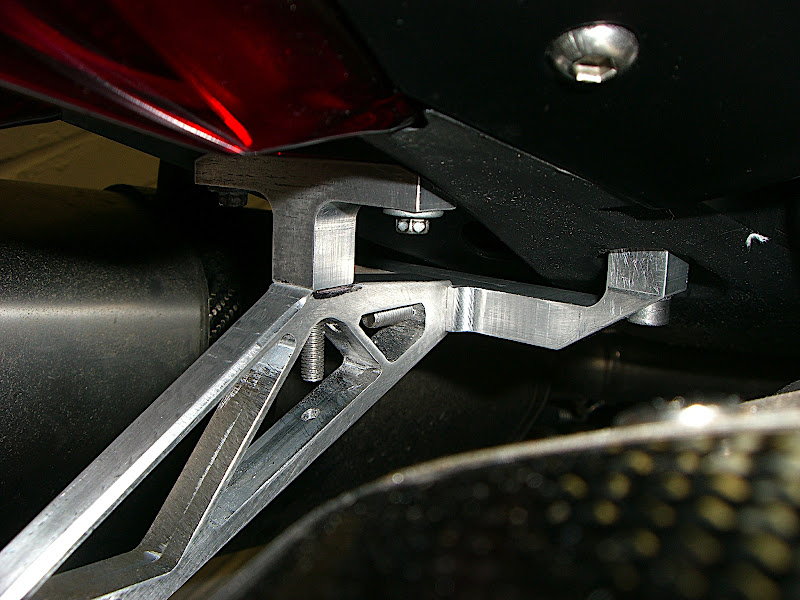
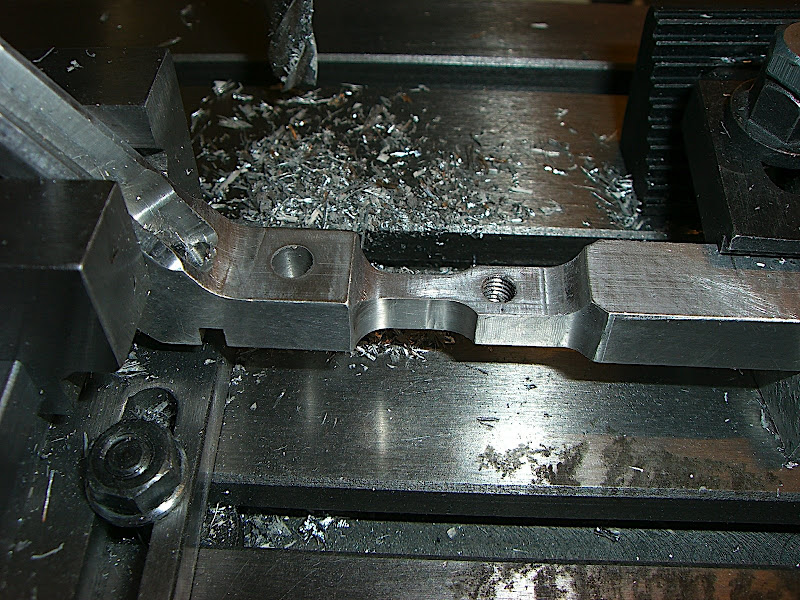
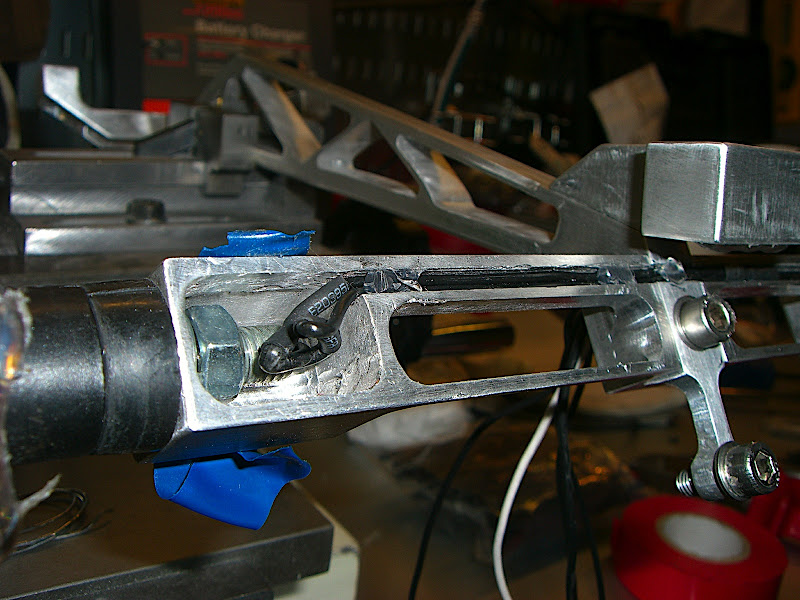
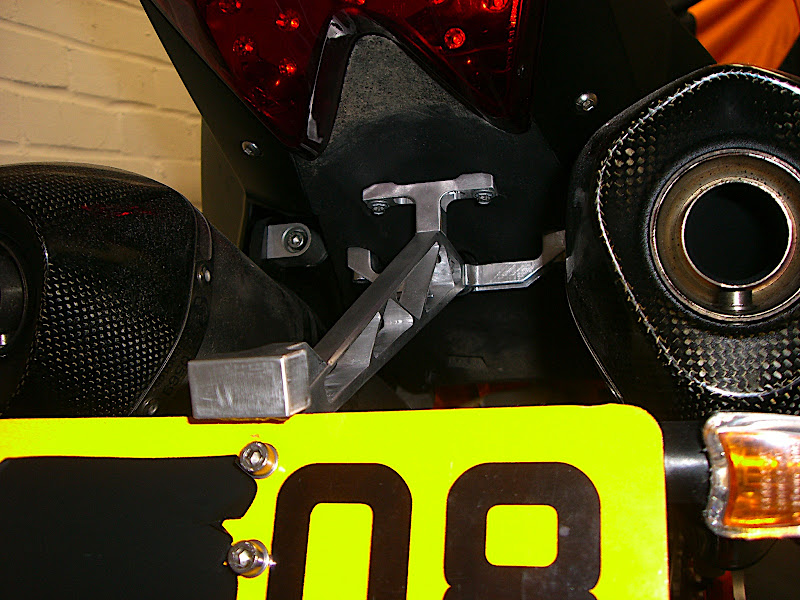
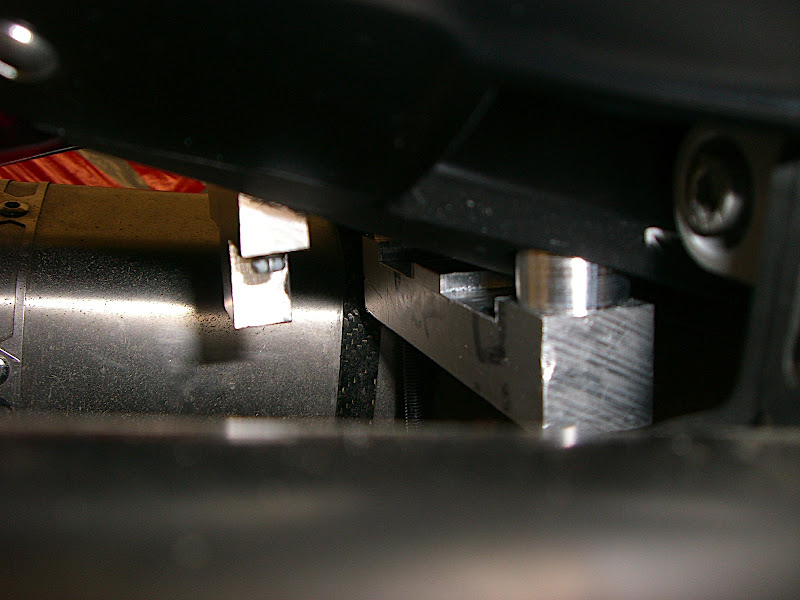
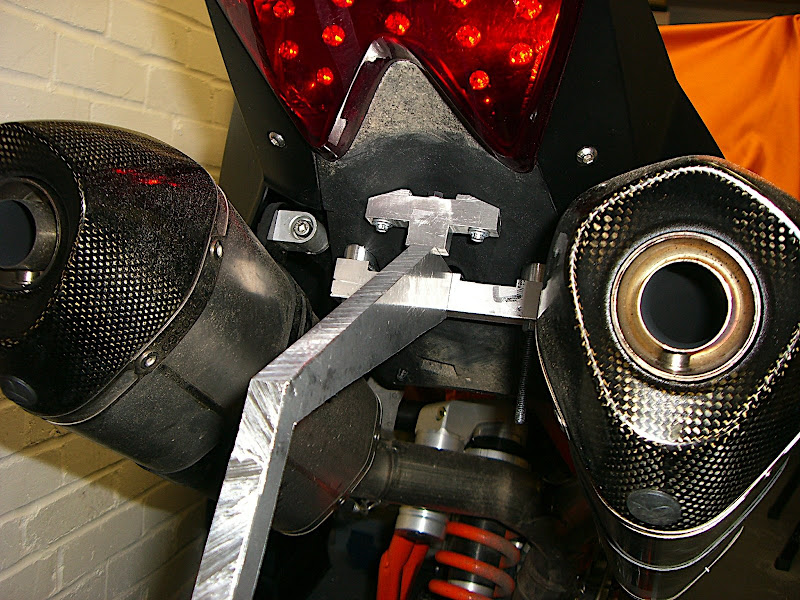
And on the bike it looks something like this after I tapped the hole for the rear holder and milled down to fit the hex-head screw so far.
Image

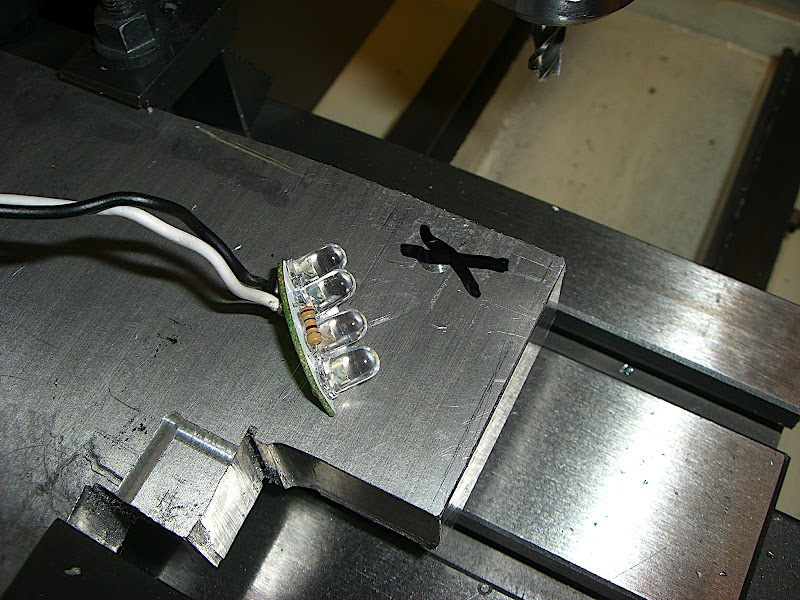
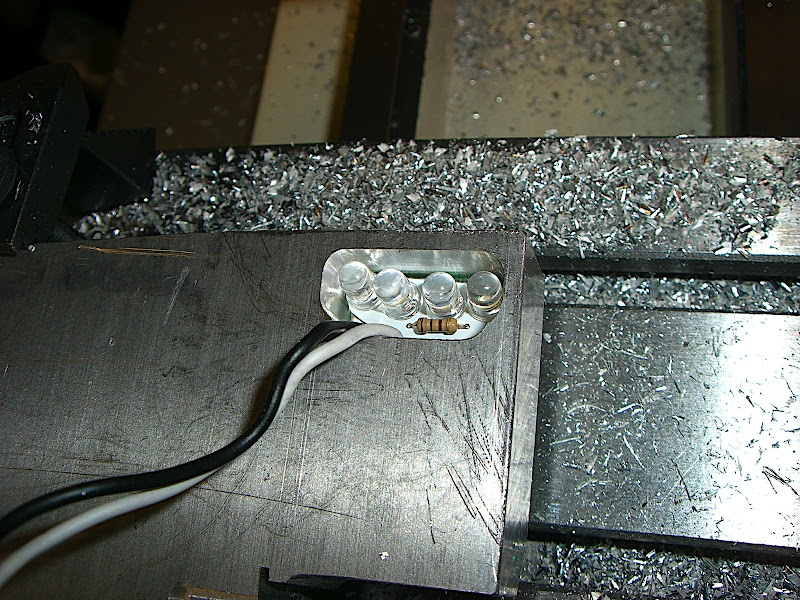
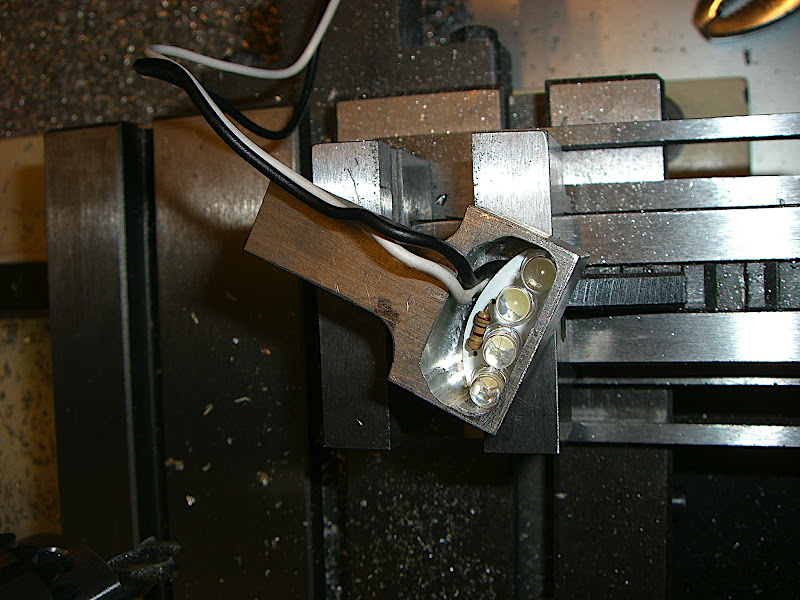
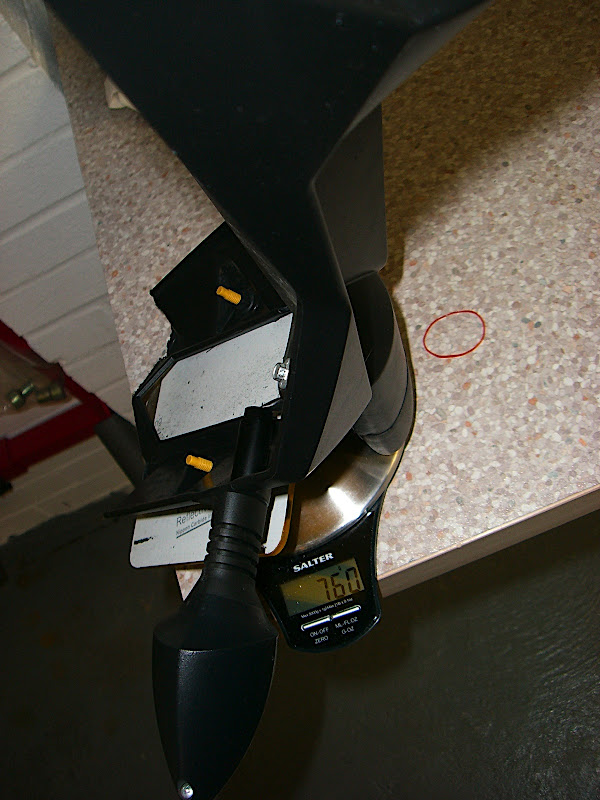
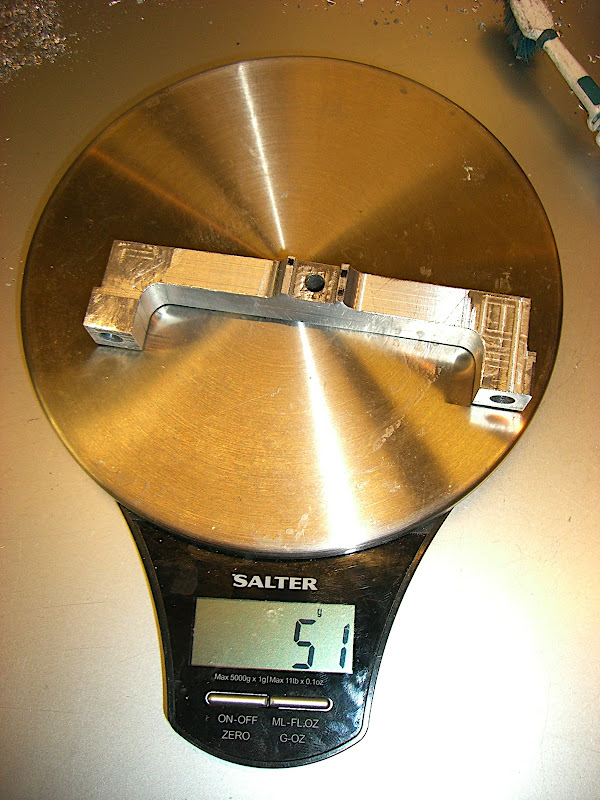
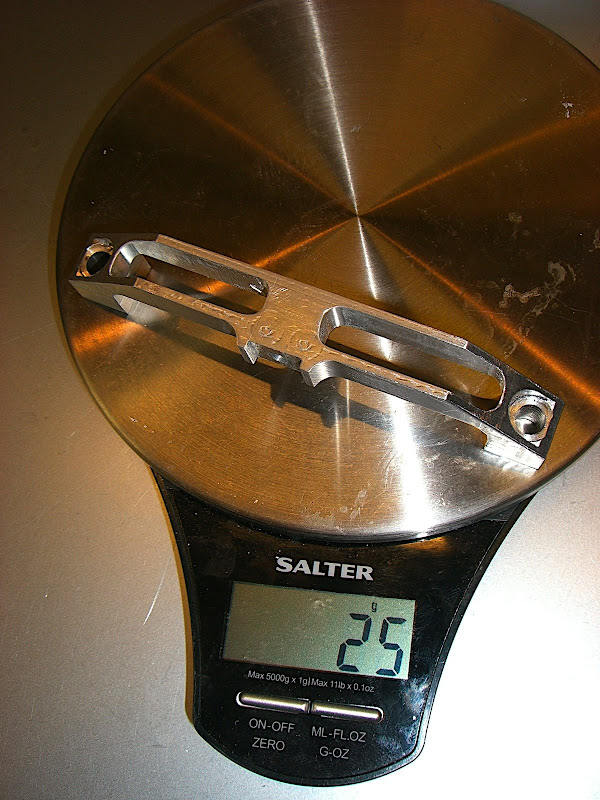
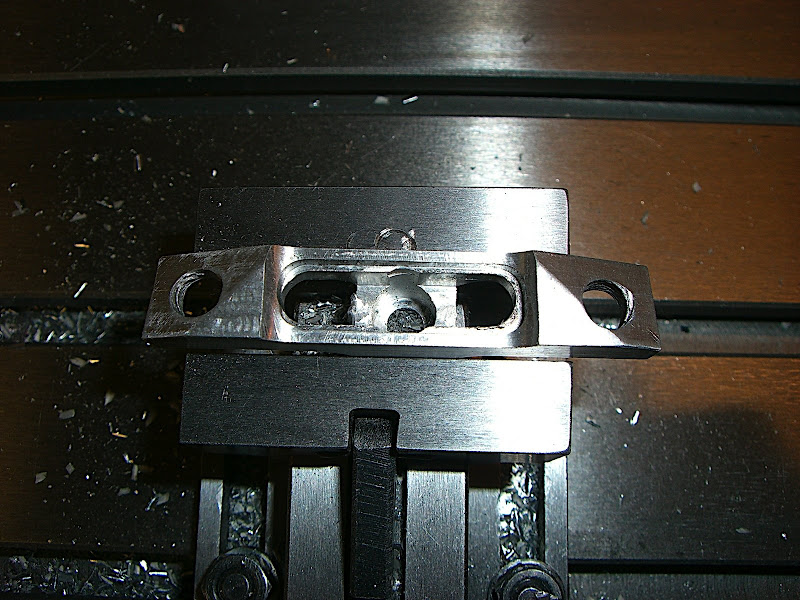
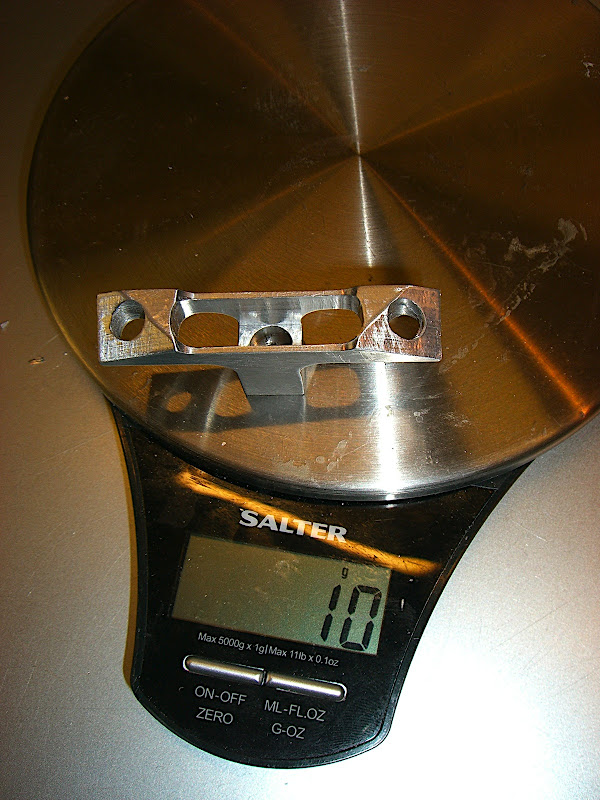
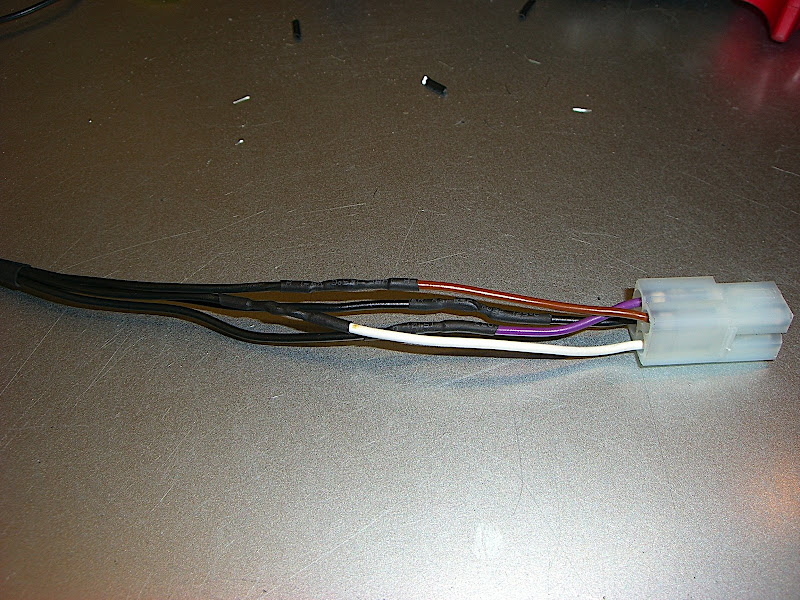
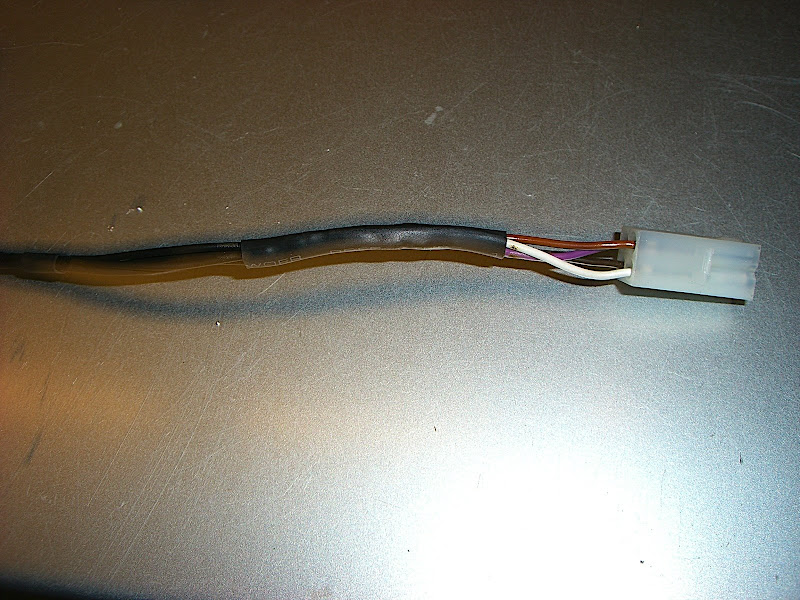
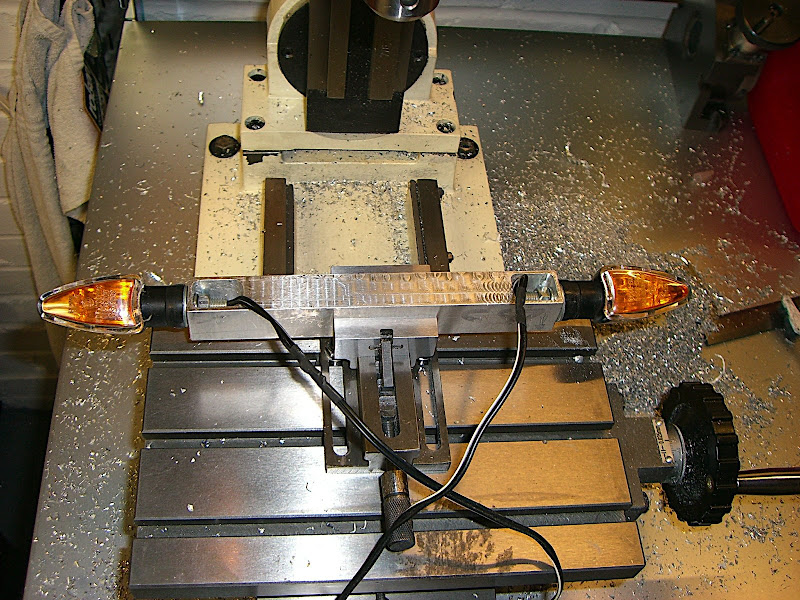
This is where the indicator holder comes from
Image

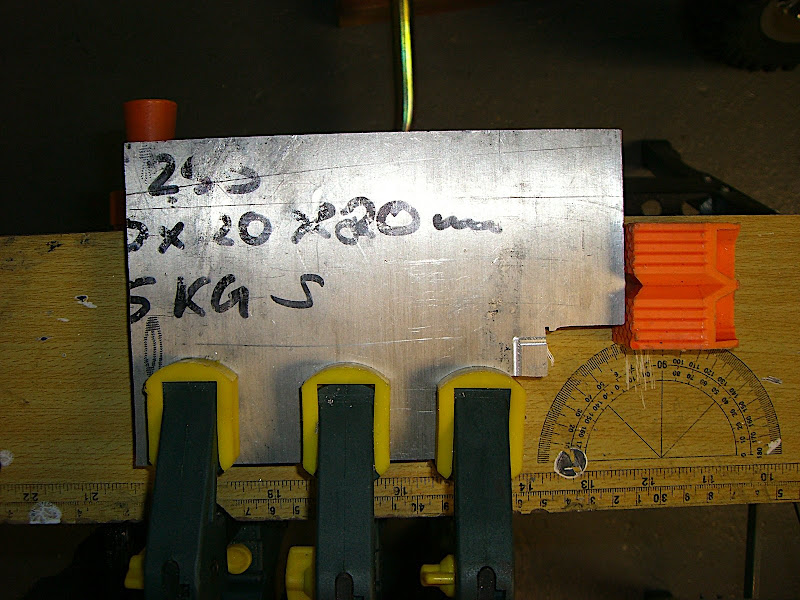
And it needs to be shaped after cutting
Image

And so far I've only made two "holes" in it to fit the indicators, like so:
Image

I've also made a start on the license plate light, I'll upload pics later...
Also, does anyone know any good source for allen-head bolts? I'd like to go select them myself (in UK), not order over the 'Net (I know Pro Bolt do bolts, and I've ordered other bolts from another company).

Cheerio.

SDSmurf

SDSmurf

2008-11-25 11:22:00 UTC

Post missing.

TheJoker

TheJoker

2008-11-25 11:26:00 UTC

Post missing.

cjc

cjc

2008-11-25 14:04:00 UTC

Post missing.

TheJoker

TheJoker

2008-11-25 14:17:00 UTC

Post missing.

TheJoker

TheJoker

2008-11-25 16:24:00 UTC

A close-up of the indicator "hole"
Image

Starting point for the plate light.
Image

Then this:
Image

I did make more progress last night, but I cleaned up and hurried back in, so I seem to have forgotten to take a pic.

TheJoker

TheJoker

2008-11-25 19:25:00 UTC

Very good, very interesting. Thanks for taking photos.
Yer makin sure it doesn't break, aren't you.

TheJoker

TheJoker

2008-11-25 23:13:00 UTC

Post missing.

TheJoker

TheJoker

2008-11-26 12:23:00 UTC

This is the generic shape of the plate light being made.
Image

Almost there:
Image

And it'll go on something like this
Image

Another view
Image

And the LEDs in. I'm going to pour resin into the "hole" and seal it in that way.
Image

More to come... Next it's time to fit the indicators, light and plate onto the arm.

TheJoker

TheJoker

2008-11-26 13:35:00 UTC

Let me start off by saying that your work looks fantastic. I was curious at first as to why you went with such thick plate, but if you plan on shaping it latter this will give you plenty of options. You could go with a nice webbed or cross member look to it.
Looking at the photo of the license plate light i am wondering if there is anyway to sneak the wires in from behind in order to hide them somewhat. Maybe drilling a small hole in from the back just big enough to fit the wires through.

TheJoker

TheJoker

2008-11-26 13:40:00 UTC

Post missing.

TheJoker

TheJoker

2008-11-27 09:37:00 UTC

Right... A tad more progress. I knew this session wasn't going to be very long, but I still managed to squeeze in some progress.

Evening off the plate-end of the arm.
Image
Sadly I didn't measure it, and it's now some silly size, like 11.4mm... I'll probably redo it a bit thinner.

Then the groove in the indicator bar that's to go onto the end of the arm
Image

Drilling the hole for the indicator bar in the arm
Image
And here I made a mistake - the hole is a bit too high, and it's drilled at the top of the indicator bar. I realised that this was a slight problem when I started to imagine the routing of the indicator wires. Now I'll have to turn it upside down, and figure out how to mount the bar a bit higher. I do have a solution to it. The drawbacks of "organic" design.

Here's the bar on the arm.
Image
You can clearly see my little mistake here. Imagine drawing with a pen a line from the indicator up on the arm, without going past the screw.

TC's SD

TC's SD

2008-11-27 15:25:00 UTC

Post missing.

SDSmurf

SDSmurf

2008-11-27 15:42:00 UTC

Very kind of you, Sir Joe

TheJoker

TheJoker

2008-11-27 22:49:00 UTC

Here's tonights efforts.

I've mostly been reprofiling the arm. Bottom:
Image

And top:
Image

Then I had to fix that annoying problem with the indicator bar being "upside down".
Image

There it is all assembled bar the light - which is the next on the list
Image

At this stage it all weighs a staggering 628g! :O

On the bike something like this:
Image

And this should give you some idea of how the plate light will be positioned (but in the centre of course!)
Image

Once the plate light is on, then I'll need to route the cables... then the lightening and beautification exercise will begin. Can't wait for that!

Stay tuned.

TheJoker

TheJoker

2008-11-28 15:48:00 UTC

Post missing.

TheJoker

TheJoker

2008-11-28 15:52:00 UTC

Post missing.

TheJoker

TheJoker

2008-11-28 15:54:00 UTC

Post missing.

TheJoker

TheJoker

2008-11-28 15:54:00 UTC

Post missing.

savoury

savoury

2008-11-28 15:58:00 UTC

The Mcgiggle tail tidy was THE most beautiful tail tidy I have ever laid eyes on, I just spent 10 min's searching it out and it has been deleted,

TheJoker

TheJoker

2008-11-28 16:01:00 UTC

Post missing.

TheJoker

TheJoker

2008-12-03 12:23:00 UTC

More pictures.

I focused on the arm last night. Finally I get to destr... erhm... lighten that one...

This is somewhat how I saw things shaping up.
Image

Cutting the first few holes.
Image
The 6mm bits I'm using are just too big to reach into the corners deep enough... I'm thinking of attacking them with a 3mm bit later on, but that means I'll have to do all the aligning work all over again....

Weight is now down to 333g...
Image

And arm still very unfinished, it looks like this
Image

.... Prognosis; more work...

SDSmurf

SDSmurf

2008-12-04 09:21:00 UTC

Post missing.

TheJoker

TheJoker

2008-12-04 18:06:00 UTC

Image

760g... but that includes a small plate, and OEM indicators. It's also chopped a tad, not very much, but still... Apples vs. Pears...

I'm just going to head out there to continue...

TheJoker

TheJoker

2008-12-05 10:42:00 UTC

A bit more progress. Was quite knackered last night, and didn't have that long to work, so not very much progress.

I've been using the 3mm bit now to get into the corners, but it's not as straight forward as it sounds. First of all I have to align all the angles on the rotary table. This takes a lot of time between the "active milling". The second issue is that the 3mm milling bit doesn't reach all the way through the 12mm thick arm. This means that I'm going to have to redo all the work from the other side. This means that all the alignments has to be done again. And I'm sure they won't align up perfectly. We'll see.

Here's a pic showing how rough the edges are before starting the 3mm milling after using the 6mm bit.
Image

Image
As you can see I've to loads of work to do from the other side on the "last hole". How I'll manage to align those, I have no idea.

Milling action:
Image

90 grams so far...
Image

Close up...
Image


And assembled...
Image

If things work out today, I'll skive off a bit earlier and get some milling done before beers and curry tonight.

"Stay tuned as Beavis and Butt-Head save some baby dolphins..."

TheJoker

TheJoker

2008-12-05 16:37:00 UTC

Post missing.

TheJoker

TheJoker

2008-12-05 16:41:00 UTC

Post missing.

TheJoker

TheJoker

2008-12-05 16:54:00 UTC

Post missing.

TheJoker

TheJoker

2008-12-10 09:59:00 UTC

More progress. I didn't have much time during the weekend, mainly because I had a Belorussian friend visit me on Friday-Saturday and we stayed up drinking till 5am. Then on Saturday it was Finland's independence day, so I had, by law, be shitfaced all day. Sunday I was trying to de-pickle my liver...

Anyway...
The arm is now down to 83g, and I can see a little bit more coming off, from where the plate attaches.
First I cut the holes from the other side with the 3mm milling bit.
Image

Which made it look something like this:
Image

I then had to cut down the "tail" of the plate light;
Image

Like this:
Image

That was so I could determine where to stop the 45 degree angles on the arm. Which I'm making here.
Image

That was a helluva laborious work, but made the arm look like this:
Image
It was laborious because of:
a) I needed to angle the milling head 45 degrees to the right, and then to left
b) The table doesn't move all the distance of the arm, so I had to re-align and re-position the arm a total of 8 times; two per side. And all it lost was some 4 grammes! Bhlergh. Looks quite nice though.

I then proceeded with the rear holder. It started out something about like this.
Image

I decided to make it simple and easy, just using a 10mm miling bit to cut a 90 degree angle.
Image

I then countersunk the bolt head
Image

And proceeded to remove as much material I could around the countersunk bolt head.
Image

It attaches to the arm, something like this:
Image

Down to 292g.
Image
I wish it would be lighter. I don't see more than 50g coming off, which is sad because I'd love a sub-200g target.

It looks like this assembled:
Image

And on the bike:
Image

Close up of the rear holder and arm;
Image

Front holder next, then plate attachment.... then ummm... loads of elbow grease, methinks...

Motohooligan

Motohooligan

2008-12-10 11:08:00 UTC

Post missing.

TheJoker

TheJoker

2008-12-10 11:13:00 UTC

Post missing.

TheJoker

TheJoker

2008-12-10 11:19:00 UTC

Post missing.

TheJoker

TheJoker

2008-12-10 11:29:00 UTC

Post missing.

collyer

collyer

2008-12-12 04:10:00 UTC

Post missing.

TheJoker

TheJoker

2008-12-12 04:13:00 UTC

Post missing.

TheJoker

TheJoker

2008-12-12 09:38:00 UTC

Post missing.

SDSmurf

SDSmurf

2008-12-16 10:41:00 UTC

Post missing.

TheJoker

TheJoker

2008-12-16 13:57:00 UTC

Righto, picture time, children.

First I started working on the front holder.
Image

Cutting the holes for the bolt heads.
Image

From 93 to 51g in a simple step.
Image

Looked like this:
Image

Then I did the sides.
Image
... 44g...

.. Or 240g in total...
Image

On the bike:
Image

But I wanted it lighter!
Image

I guess 25g (of about 100g starting weight) is OK..!?
Image

And the assembly is now 222g.
Image

I also wanted a bit more weight off the indicator bar.
Image

Which now looks something like this:
Image

Next victim was the tail of the arm;
Image

Almost done here...
Image

one more cut...
Image

Arm was now 77g with the end still attached.
Image

And down to 65g after it was cut off... YAY! I'm naturally going to file the end into a round shape.
Image

assembly was now 187g.
Image

I then focused on the rear holder:
Image

Which ended up being 10g
Image

Which brought the whole shebang down to 182g
Image

I also attacked this part:
Image

179g!
Image

Close up of the tail.
Image

And the front of the assembly.
Image

And the front from the underside.
Image

With the shorter bolts in, it's now 172g!
Image

Plate assembled.
Image


Next thing I'm going to do is to sand it down to get rid of the milling marks. Then I'm going to solder the wires together and all that. Then put it on the bike for a month or so to make sure it all works well. If it does work well, I'll strip the cabling off and put some finish on it. Possibly black anodising.

What surprises me with the whole thing is that it's still very very very very rigid, despite losing a lot of weight. In fact 628g to 172g is a weight loss of 464g, or in percentage, the weight is now 27% of what it used to be. Quite pleased with that.
Also, if I did buy the correct titanium bolts, I might lose an odd 6g or so more, putting it below 170g.

That's all, folks!

SDSmurf

SDSmurf

2008-12-16 14:52:00 UTC

Joker, Can you chamfer the 90* turns?.... were you planning to, joe does not like sharp objects, the curve represents the softness or tolerance in life.

I know that removing the corners is tedious work and requires different machinery and labour intensive elbow grease. just my mind working on your beautiful art.

TheJoker

TheJoker

2009-01-04 12:48:00 UTC

Crappola... I thought I had posted the latest pics. I'll get back to you ASAP, Sir!

SDSmurf

SDSmurf

2009-01-04 13:01:00 UTC

Good to hear, well done! So you've applied a finish to it already? What did you decide on (impatient bastard aren't I )...

TheJoker

TheJoker

2009-01-04 13:41:00 UTC

I friggin thought I had written the post, and I had. Luckily I had it saved on my HDD.

Here's the post I was supposed to post on the 20th December!
Righty-ho...

More progress.
Loads of sanding has been done. Like so
Image
And so..
Image

Mainly using these
Image
and a lot of elbow grease... *sigh*

And today I've put the electrickery on
Here's the plate light, lit up
Image
Too bad you can't really see it. I've more or less, filled the hole with hot-glue-gun-glue and the LED lights of course.

Indicator cables routed:
Image

The underside of the arm;
Image

And on the bike it looks like this:
Image
And like this..
Image

And a shot from the underside:
Image

All I need now is the connector () to make a nice non-butchered connection to the "system". I can use shiyat connectors, but I'd rather not. But I might have to in case the sun is shining tomorrow.

.... end of 20th Dec transmission.

No, I haven't applied any finish to it. I didn't want to spend money on a finish (anodising primarily) if I had to take to the milling machine again. However, now, in hindsight I haven't had to do that, but I have now glued all the cables to the tail tidy, and therefore removing the cables is going to be a bit of an effort. Bhlergh. Whicever way you turn, your arse is behind you....
So, there it is on the bike, working just fine, without any finish, for now.

Millar

Millar

2009-01-04 15:15:00 UTC

If it's only hot glue then it should be fairly easy to remove from the ally, failing that just warm it up again and wipe it off.

SDSmurf

SDSmurf

2009-01-04 15:46:00 UTC

Either way, looks great.

TheJoker

TheJoker

2009-01-04 16:18:00 UTC

Joker, you do know that they make specific tools just for removing the metal parts from the plastic parts on said connector?

TheJoker

TheJoker

2009-01-04 19:17:00 UTC

Post missing.

TheJoker

TheJoker

2009-01-04 19:17:00 UTC

Post missing.

TheJoker

TheJoker

2009-01-04 19:18:00 UTC

Post missing.

TheJoker

TheJoker

2009-02-09 11:30:00 UTC

Post missing.

Colonel_Klinck

Colonel_Klinck

2009-02-09 11:49:00 UTC

Post missing.

TheJoker

TheJoker

2009-02-09 15:15:00 UTC

Post missing.

Colonel_Klinck

Colonel_Klinck

2009-02-09 15:31:00 UTC

Post missing.

TheJoker

TheJoker

2009-02-09 17:28:00 UTC

Image


Dude that has to be the best looking tail tidy for a SD i have seen. Man i wish i had a garage, milling machine, know how, talent, imagination. Excellent work!!!

Colonel_Klinck

Colonel_Klinck

2009-02-09 18:18:00 UTC

Post missing.

TheJoker

TheJoker

2009-02-09 22:59:00 UTC

Post missing.

Colonel_Klinck

Colonel_Klinck

2009-02-09 23:07:00 UTC

Post missing.

TheJoker

TheJoker

2009-02-10 08:29:00 UTC

Post missing.

Colonel_Klinck

Colonel_Klinck

2009-02-10 08:40:00 UTC

Post missing.

TheJoker

TheJoker

2009-02-11 11:21:00 UTC

I've finally got round to fixing the wiring. I bought the OEM cable from KTM (~£10) and butchered it to suit.

Here's the OEM cable soldered onto my own wiring.
Image

More shrink tubing.
Image

That's how it looks now.
Image

I'm quite pleased with the weights. Here's comparing as close to apples-to-apples as I can.

OEM stuff
Image
784 grammes. It's close to OEM. The difference is that it doesn't have the same size plate as mine. This plate is smaller, and a legal plate is even larger. My plate is -1" smaller than legal, and this one fitted to the OEM tail tidy is even smaller than that. The OEM one is also chopped off a bit below the plate as you can see.

And here's my effort:
Image
397 grammes. YAY! That's a saving of 387g. Almost half!

And here's the shot from inside of the tail unit. A bit of bodge tape to seal off the muck from the rear wheel.
Image

The only thing that bugs me now is that I didn't anodise the whole shabang before doing the wiring. As it is now I'll have to de-solder the wiring and take it apart. Not to mention that I need to undo the lights in the plate light. It might stay this way for a while.

TheJoker

TheJoker

2009-02-11 14:45:00 UTC

I can feel the intervention coming..... hehehehee

(thanks all for your support!!! I have made progress!!! WeeH00000 !! <----- just had his teeth cleaned and Oi !!! it's fresh..

TheJoker

TheJoker

2009-02-11 16:47:00 UTC

Post missing.

Jody

Jody

2009-02-12 07:08:00 UTC

Post missing.

TheJoker

TheJoker

2009-02-12 10:11:00 UTC

Post missing.