
Thanks to these guys - in no particular order.
Sam - You sparked it all. Thanks! (No thanks for forgetting the K after 1000 ohm )
cat - You've been a huge source of information and support. And found the plugs at Eastern Beaver.
Plipton - For letting me know that the PCIII map in his bike doesn't actually change the fuelling that much.
vertigo66 - For information and testing the PCIII plugs without the PCIII
bigash - Also for information on the PCIII plugs without the PCIII
pulcinella - THANKS for confirming that the resistor is 1M Ohm and not 1K Ohm! This was the clincher!
jehadjoe - For being who he is.
Why should you do this?
To cut a long story short. The LC8 engine is designed to conform to EU (and other countries) exhaust regulations. Therefore somewhere around the 4,000 rpm the engine tries really hard to please the politicians and the tree-huggers. The O2 Sensors are there to allow the engine to work in, what's called, Closed Loop. This means that the ECU reads the input from the O2 sensors and then adjusts the fuelling to be as hippy-friendly as possible. Sadly this doesn't seem to work well. It results in the bike being jerky and quite unpleasant to ride. Try riding at 30mph (50km/h) in 2nd gear. Should be around 3,000 rpms at a steady throttle and you'll see that it can be quite a daunting task.
There's an upside to this. The bike can only go into Closed Loop when a certain factors are all present. If it can't go into Closed Loop mode, it'll use the fixed fuel maps created by KTM. These maps don't change on a whim (or based on a low cost second rate component such as the narrow band O2 sensors). The bike runs really well on the fixed fuel map. Therefore the trick is to prevent the ECU going into the Closed Loop mode. The O2 plugs are the answer to this.
But... won't this pollute the world..?! Not really. The bike runs the predefined fuel maps above about 4,000 rpms, and below when the engine isn't warm (and that's when it's spitting out the msot emissions anyway). Therefore you'll lose a bit of green-kudos, below about 4,000 rpms when the engine is hot. Otherwise the emissions are the same.
Alternatives
You can buy the PowerCommander III and use the plugs from that package. Or you can get just the plugs. They're USD15 in USA, and GBP37 (+ P&P). To me, this was an unacceptable price.
The Plugs.
There's four wires on the O2 Sensor. Two white, and a grey and a black one. The white ones are for the O2 Sensor Heater. These two wires should be replaced with the 330 Ohm resistor. The grey and black ones are for the O2 Sensor's output - i.e they tell the ECU what's going on. These two wires needs to be replaced with the 1M Ohm resistor.
The Material.
The most essential stuff is the four resistors. You'll need two of 1W 1M Ohm resistors and then two of 3W 330 Ohm resistors. There's a large chance that you can use lesser wattage resistors too, but I've not tried them. The 1M Ohm resistor could possibly go down to 0.25W, and I'm fairly sure it can be 0.5W. I've tried 0.25W for the 330 Ohm, and they got very hot, but didn't fry. 0.25W might work, 0.5W should be better, 1W probably even better, and the 3W I'm using is getting warm, but not too hot. Let me know what you try and how it works! I got my resistors from CPC http://cpc.farnell.com/fixed-resistors and Farnells http://uk.farnell.com/browse-for-products in UK. They're the same company, but Farnell has got a minimum order of £30, whilst CPC butt-rams you with a handling fee of £6 or something.
Then you might want some plugs. I got mine from Eastern Beaver. Order two of "4P090WP-MT Connector" from here: http://easternbeaver.com/Main/Elec__Pro ... sm-mt.html If you feel clumsy, get an additional set of "Connector and Pin Set", number "FM090WP Kit". Whilst you're at it, get some of that amazing heat shrink tube that's got glue on the inside of it. It'll make nice waterproof connectors everywhere.
To make mine (well Mk II) pretty, I used some (non-glue) heat shrink tube.
How to assemble it.
If you want to go the cheap and perhaps unreliable way, just get the resistors and stick them into the connector at the bike. Something like this:
Then tape it up, and "Done!"
If you want to be cheap, but a bit more reliable, and you don't care about the original wiring loom on the bike, cut the freakin' cables and solder the resistors on.
If you want it all to look a bit "factory" then you'll get the plugs too, some heat shrink, and you assemble them something like this:

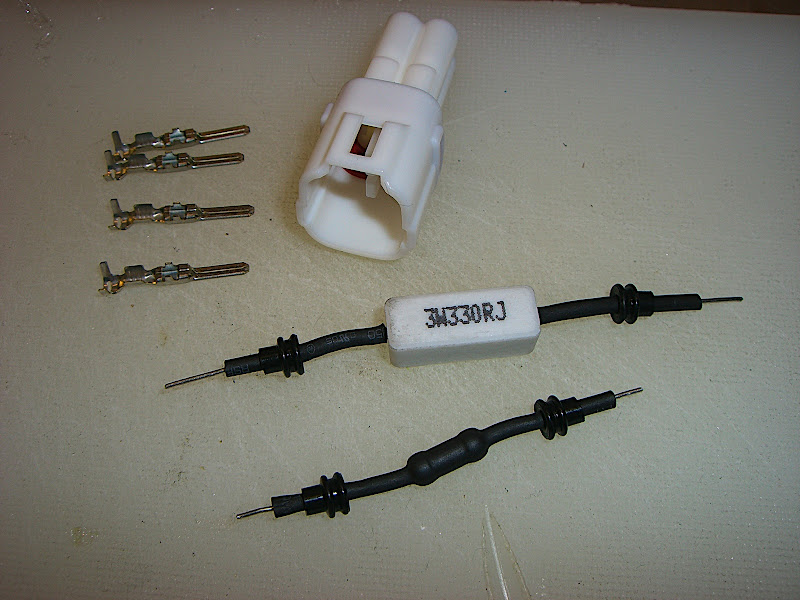
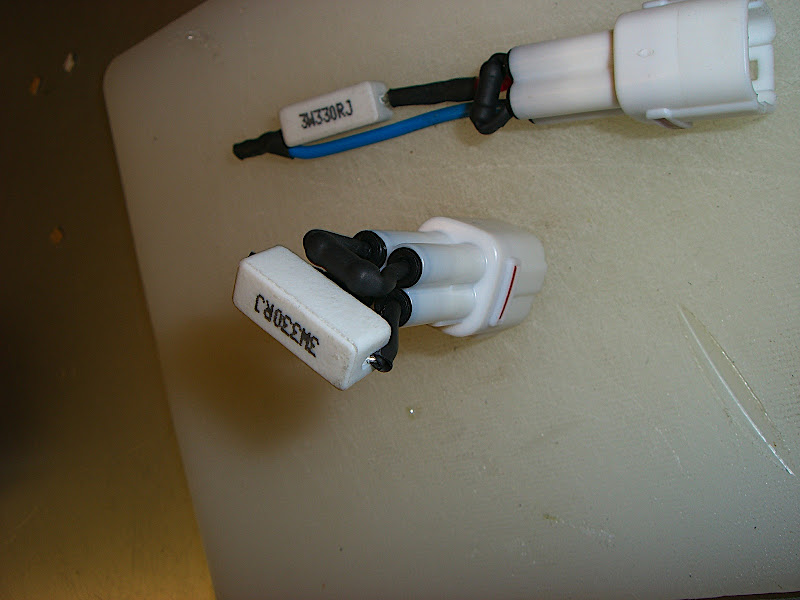
At the bottom is Mk I, which I will probably redo so it looks like Mk II. The parts at the top are. The plug, with pins and seals. Then there's the 3W 330 Ohm resistor with some heat shrink on it. Then there's the 1W 1M (that's 1000K) Ohm resistor and some heat shrink to go over it.
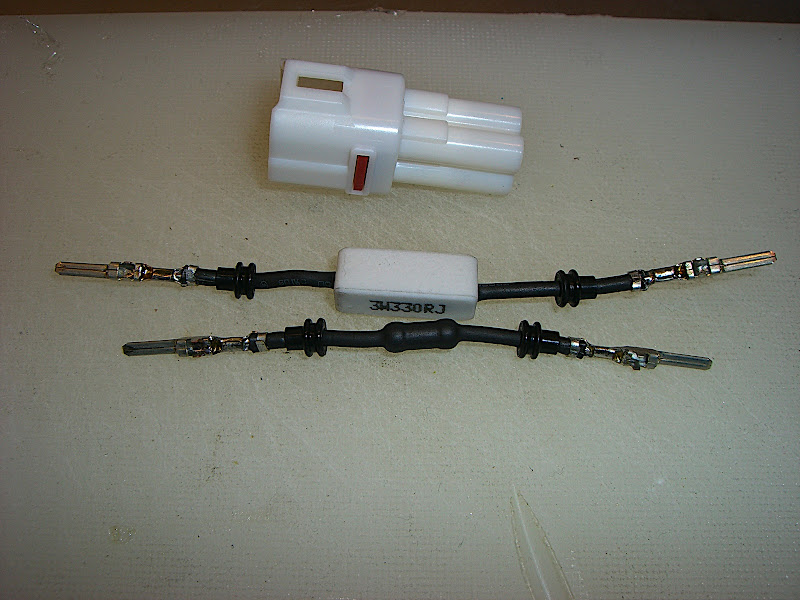
Heat shrink it all on, and then stick the seals on. Should look like this.
Solder on the connectors, and it should look something like this:
NOTE: if you have a real crimper too, or just some luck, you might be able to simply crimp the resistors on. I soldered them for reliability and I have the soldering iron readily available.
Then you need to stick the connector pins into the plug.
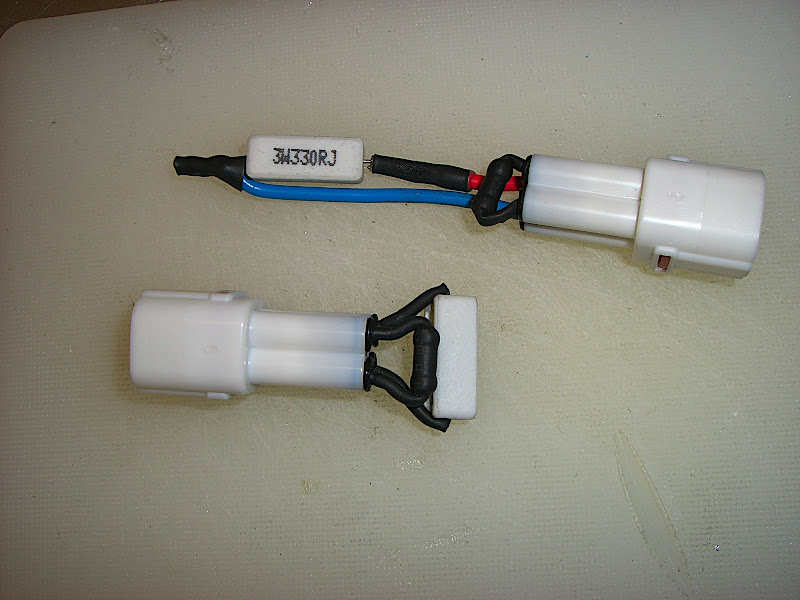
And...
The pictures aren't really good as they don't show things "all the way round". However, we'll call the side with the locking pin "the top", and the bottom one, erhm, "the bottom".
The 330 Ohm resistor goes into "the top" (where the white-white cables used to be), and the 1M Ohm resistor goes into "the bottom" (where the black-grey cables used to go).
Mounting on the bike.
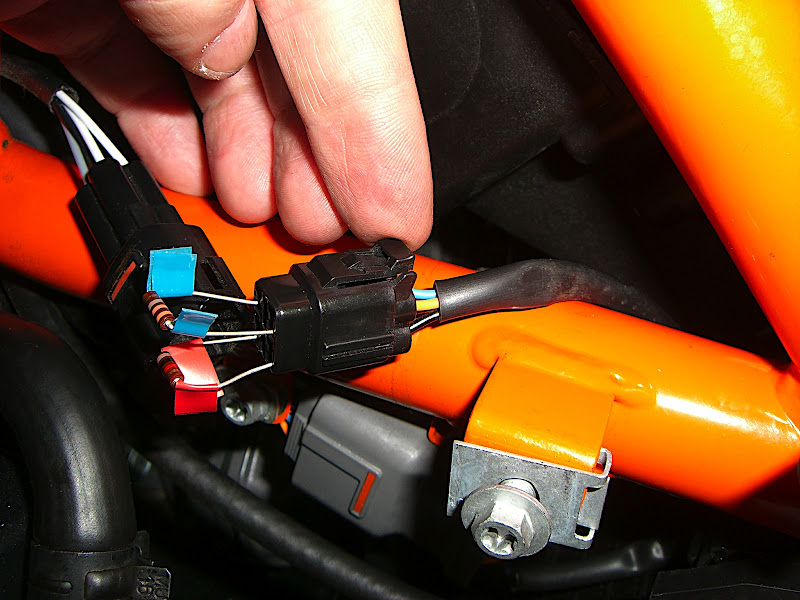
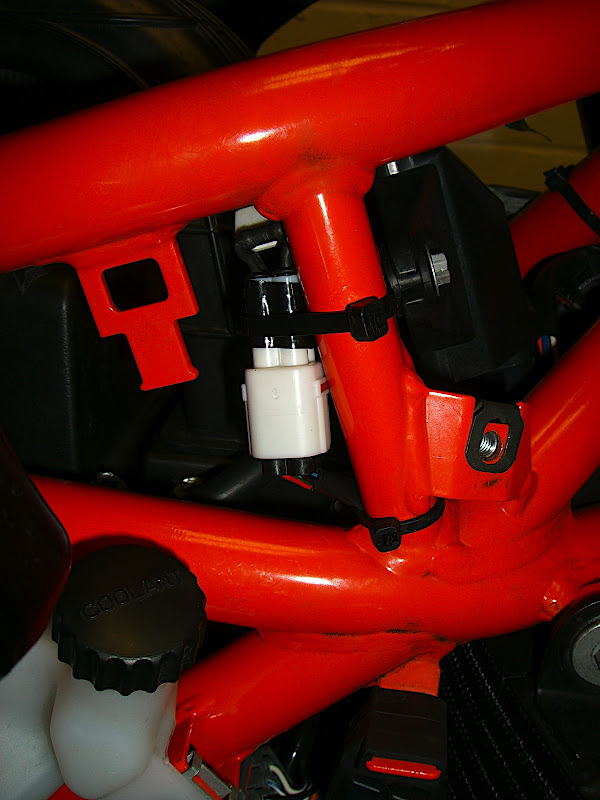
You'll locate the front cylinder's connector behind the coolant expansion tank. To do that (on my 2008 SDR) you'll need access. Remove the tank shrouds, both of them. Take the seat off, and the seat-holder that's near the back of the tank. Then undo the tank-holding bolt and lift up the tank and prop the tank up a bit (30cm should do it). Make sure you don't have too much fuel in the tank as it'll start dripping out. Then you can see the expansion tank, undo the two holding bolts and unclip the hose behind the tank. Lower the tank out of the way. It should be safe to just leave it dangling there for a few minutes. Locate the connector that's hiding somewhere between the air box and the frame. Get your girlfriend or an infant to release the connector. Once you've got connectors apart, simply put your new and shiny home made connector on. I taped up the O2 Sensor part, but in hindsight I could have used the male-connector with some blanking plugs (you can get those from Eastern Beaver too). Then I zip tied the O2 cable up like this:

And the new O2 Sensor Plug like this:
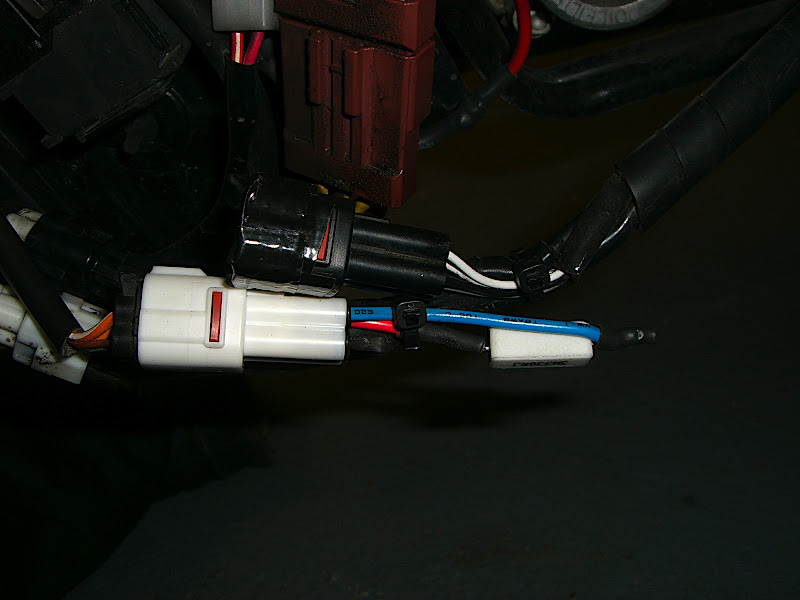
The rear cylinder is a bit easier, but you'll have to bend down if you don't have a table. Take the battery cover - the front cowl behind the front wheel - off. On the SDR that's fastened with a bolt on each side, and then the two screws with 6mm head underneath. Slide it down/forward. On the battery side you need to locate the four pin connector that's got white-white-grey-black wires going towards the rear of the bike. Undo the connector and slide on your new O2 Sensor Eliminator Plug. Again, in the pics I taped up the O2 Sensor Cable, but I should have used the male connector with blanking seals. I'll do that at some point.
Testing
Stick the expansion hose back on the tank, screw the tank into position and start the engine, as normal. You should not get an FI light when you start the bike. The important part is to run the bike till it gets warm, because the ECU will heat up the O2 Sensors and before they're warm, it won't know if they're working or not. Keep an eye on the bike. Give it some throttle once in a while so make sure it gets proper oil pressure and builds some heat.
If your bike is warm enough to start the cooling fan, and you haven't had an FI light blinking, then things are tickety-boo!
The error codes are one long, seven short blinks for the rear cylinder, and one long and eight short blinks for the front cylinder. If you get any or both of these, things didn't work out.
Now all you need to do is to put the tank down, panels on, seat (and holder) on, front cowl on and you're ready to rock.
The Result
What can you expect from this? Well, the engine will be much smoother, much smoother. In fact, this is probably the modification that makes the biggest difference to the running of the engine.
Other modifications you should do.
Balance the throttle bodies. This helped my bike a lot! http://www.superduke.net/forum/viewtopic.php?t=5347
Remove the SAS functionality. This helped quite a bit on my bike. http://www.superduke.net/forum/viewtopic.php?t=7272
And my next thing is to take the TuneBoy kit (http://www.tuneboy.com.au/ http://www.tuneboy.co.uk/) to a Dyno and get the fuelling spot on.
Again, biiig thanks to everybody involved!!


